Reading time 4 mins
Introduction
- From your left-hand menu, click on Data Analysis followed by Analysis Reports.

- Here you will see the Workforce Compliance Matrix Report option. Click View to run the report.
- You are now presented with a report showing each user and all the active compliance requirements in your system. An active requirement is a requirement that is currently assigned to at least one user.
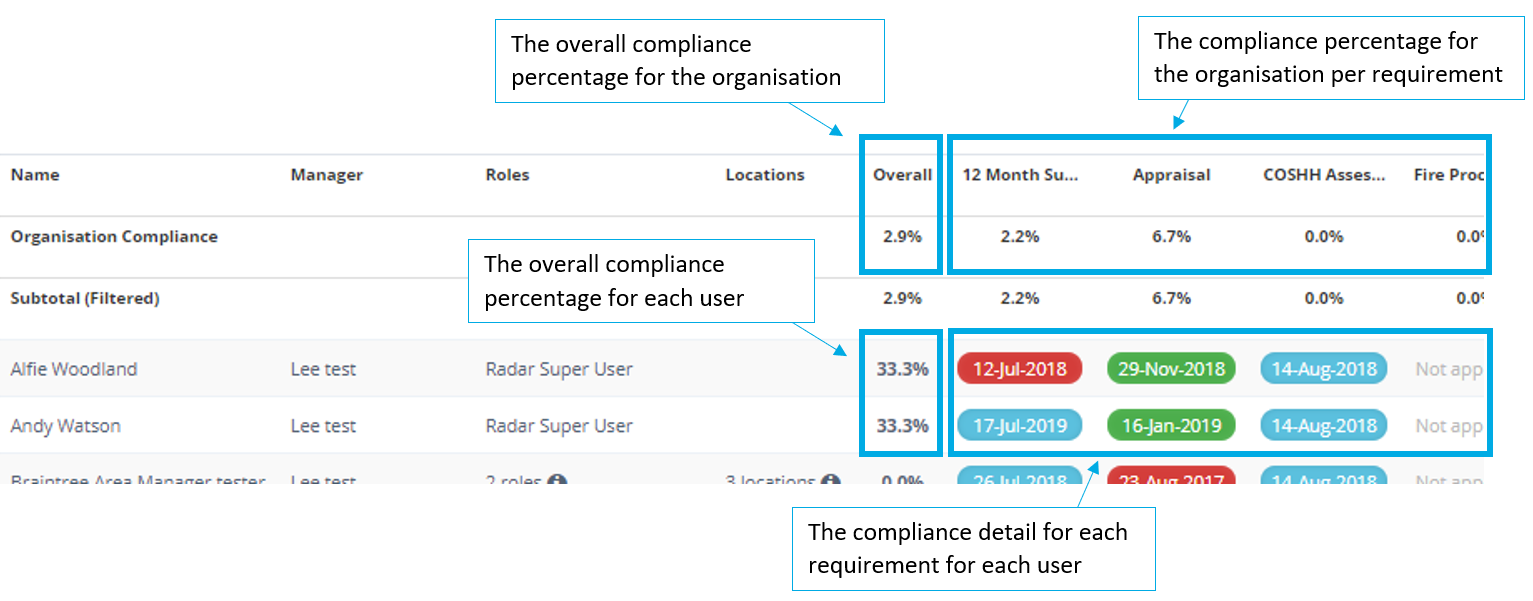
- Here you will see:
- The overall organisation compliance shown as a percentage
- The compliance percentage for each course for the organisation
- The compliance percentage for each individual user
- The compliance status for each course for each user

- The colour coding for each of the requirements is as follows:
- Compliant (Green) - requirement is completed and in date
- Overdue (Red) - requirement is past the due date
- Planned (Blue) - first instance of the requirement and has a future due date
- You can filter to view the compliance detail as one of the following:
- Show next due date – this will show the date that each course/requirement is next due to take place. If the label is showing “Not Applicable” there is no next due date for that requirement for that user.
- Show last completed date – this will show the date that each course/requirement was last completed. If the label is showing “Not Applicable” then the course/requirement has not yet been completed by that user.
- Show Status Text – this will show the labels “Compliant”, “Overdue” or “Planned”
Viewing the Matrix Report by Location or Region
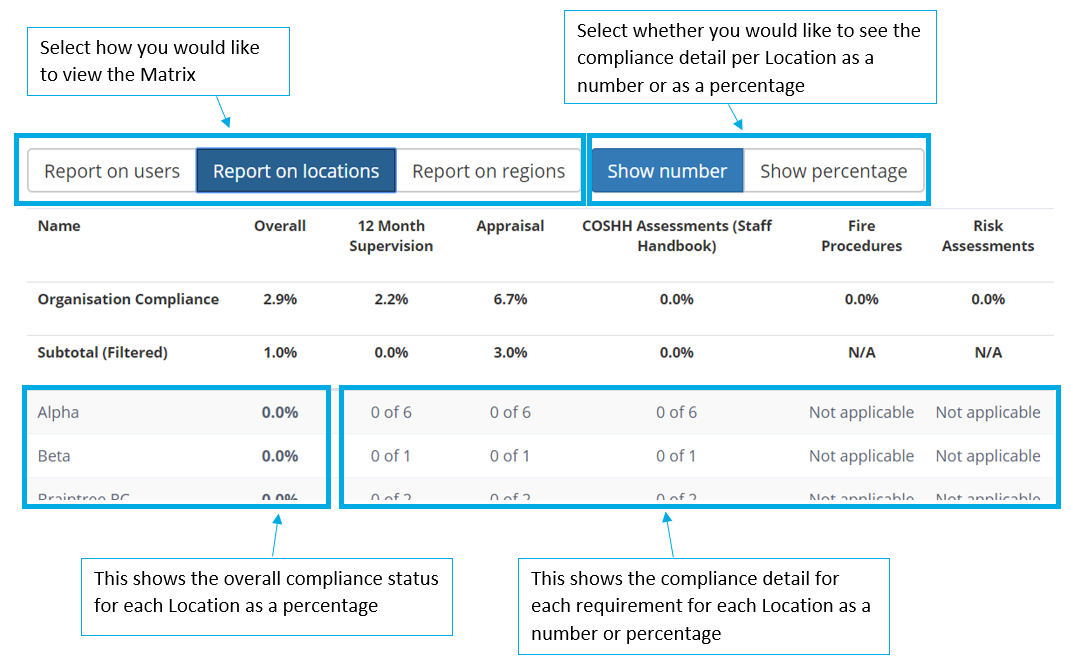
- To view the matrix broken down by Location or Region, select Report on locations or Report on Regions, respectively. You will then be able to see the overall percentage compliance for each Location or Region, along with the compliance detail as a number or a percentage for each Course/Requirement.

Filtering the Matrix Report
- There are various options available for filtering the matrix report. To view the filter options, click Show Filters.
- The following options will appear:
- Users – select the name(s) of the user(s) you wish to include in the matrix report. The report will only show the results for the users you have selected
- Managers – select the name(s) of the manager(s) you wish to filter on. The report will only show the users managed by the selected manager(s)
- Roles – select the roles you wish to filter on. The report will only show the users that have been assigned the role(s)s you have selected
- Region – select the Region(s) you would like to filter on. The report will only show users who belong to either the selected Region(s) or a Location within the selected Region(s)
- Locations – select the Location(s) you would like to filter on. The report will only show users who belong to the selected Location(s)
- Requirement Tags – select the tag(s) for the requirements you would like to filter on. The report will only show requirements associated with the selected tag(s)
- Requirement Type – select the specific requirement type(s) you would like to filter on. The report will only show the requirements selected.
- You can combine any of these filters to produce the report that you require. To clear the Filters, click Clear Filters.
Viewing Non-Active Requirements
- By default, the results shown in the matrix report will only show requirements that have an active allocation. If you wish to view any requirements that do not have an active allocation, check the Non-active Requirements box.
- A non-active requirement is a requirement that is not currently appearing in any way against a user. This may be because the requirement has never been assigned, or it may be that the requirement has subsequently been removed from a user.
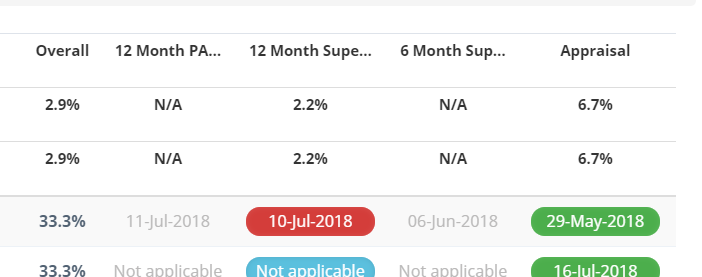
- If a requirement has been completed by a user, but has since been removed, the last date completed will still show on the matrix report under the Show last completed date option, however the date will be greyed out, as per the screenshot below:

Exporting the Matrix Report
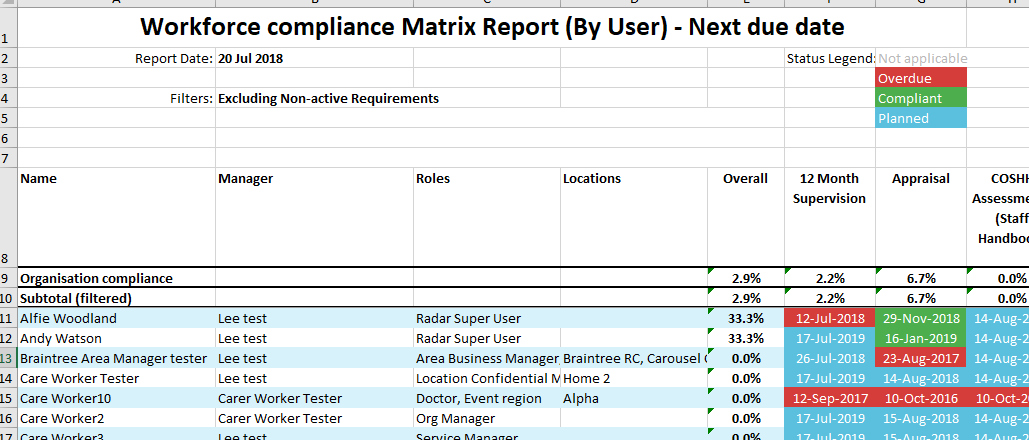
- To export the report, ensure the relevant filters are applied on screen (as these will pull through into the export) and click Save to Excel.
- This will export the report into a pre-formatted excel document.


