Reading list 4 mins
Introduction
Tags enable you to report and track key fields/questions within your Forms, allowing you to report on this data in your Analytics dashboard.
Tags apply to questions where there is a selection option for the user. I.e. Yes/No or a drop-down Select question.
For example, you may have included the question "Is this a CQC notifiable event?" which you would like to report on the Analytics dashboard.
We can use a tag to report back to us each time the answer is 'Yes'. This means we can track this KPI across all our Events Forms, filter our Analytics on this information and set Pulse notifications to inform you of any key activity.
In this example we'll be able to see the total of CQC notifiable events in our chosen timeframe, filter to see the spread of these events by location, set a pulse to tell us the moment we exceed a set number in a month, and much more…
Creating a New Form Tag
- From the side menu select Administration.
- Choose the Tag Management option.
- You'll now be presented with any existing Tags you have in place.
- Please search to see if the Tag already exits. If so, please move onto the next step in this guide.
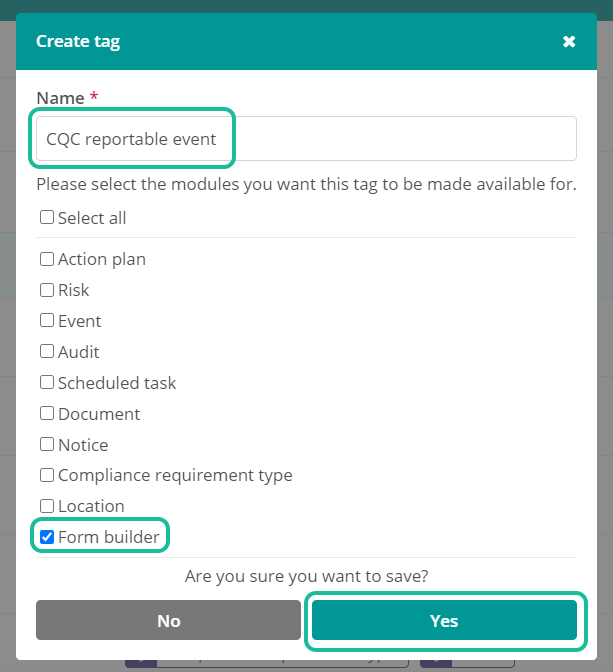
- If this is a completely new Tag, please select Create tag.

- Enter the name of the new Tag and choose the modules you wish to use it for. For our purposes we need to include Form builder and save.

- We'll now see the new Tag on our Tag management menu.
- We can now use this Tag immediately.
Editing an Existing Form Tag
- From the side menu select Administration.
- Choose the Tag Management option.
- You'll now be presented with any existing Tags you have in place. Tags can be used across multiple modules within Radar Healthcare. For this purpose, we are interested in Form builder Tags.
- Find your tag and if it is labelled Form builder then you do not need to do anything. If this Tag exists but doesn't have the label, we need then select the three-dot menu at the side of the name and Edit.

- You'll now be given the option to change the label. Simply select Form builder and Save.
Adding a Tag to a question in a Form
- In this guide we will be adding a Tag to an existing question, however the process is the same should you be creating a new question and wish to use this feature immediately.
- From the side menu select Administration.
- Select the Form Editor option.
- Select the Form you wish to add this Tag to by choosing the name.
- If you're creating a new Form, please do the following the steps below once you have your questions in place.
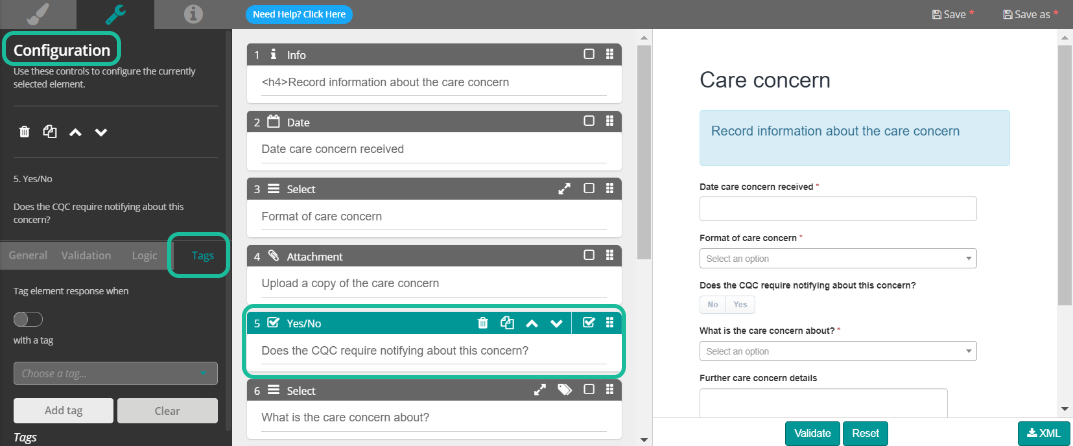
- Choose the question you wish to add the Tag to and select Tag on the Configuration panel.

- In this example we are using a Yes/No question, however this can also apply to a Select question following the same process.
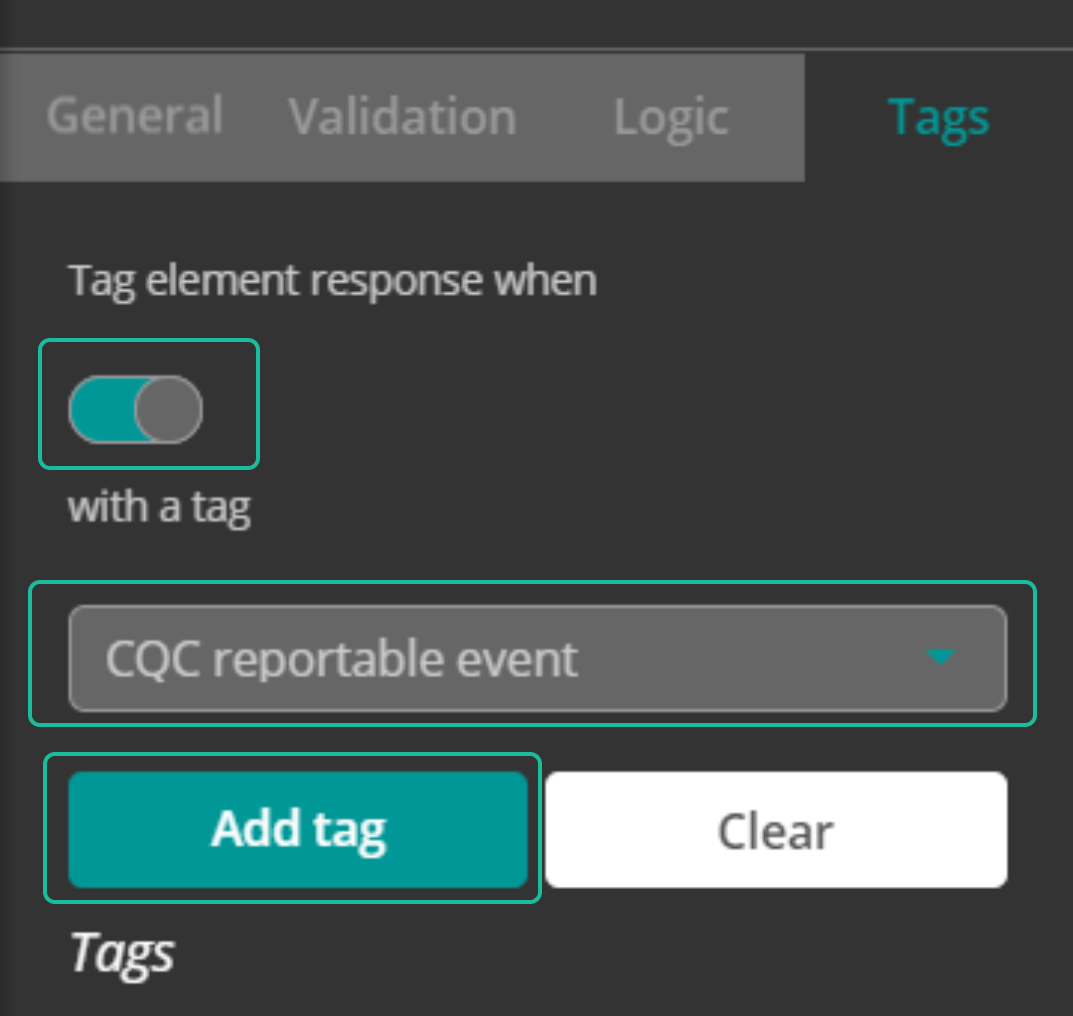
- Under Tag element response when choose the appropriate option. In this instance we can toggle the option to show Green=Yes and Grey=No. Under with a tag select your specific Tag from the list, and finally select Add tag.

- You'll now have a statement confirming the Tag is in place.
- Repeat the above process to ensure your Tag is associated to this question in each Form it is used.
Viewing Tag Data in Analytics
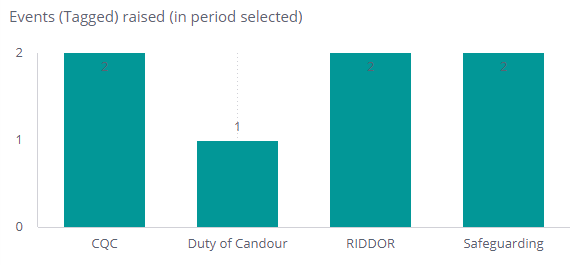
- Once your Tag is linked to a form field, you will be able to track the field in your 'Events (Tagged)' graph on the Events Analytics Dashboard.

- Go to the Dashboard in your side menu, click on Analytics and select the Events dashboard.
- You'll now be presented with your Analytics regarding your Events.
- Scroll of the bottom of this page to see the graph for your Tags.
- *Tags will only show if there has been any data associated to them.

- You can select the column relating to your tags to filter your Analytics accordingly.
- To add a Pulse notification regarding a tag simply select the tag column, choose the graph displaying the information most pertinent to you and use the three-dot menu to create a pulse alert.
- Choose the Pulse which best fits your requirements. In this example we have filtered our Analytics on this current month, have our 'Concerns about staff attitude' tag selected in the tag graph and wish to be notified if we receive more than 2 in a month.
- This Pulse will retain your filters even when you reset them in your analytics afterwards.

