

Reading time 8 mins
-
This guide outlines how to transfer audits from the original Audit module (version 1) into the Enhanced Audit module (version 2).
-
If you have been using the original audit module, please ensure you have asked Radar Healthcare to activate Enhanced Audits within your system. This can also be requested for your Staging site if you wish to practice and test before committing to your Live site.
The original Audit module will no longer be supported after 11th April 2025. Please transition to the Enhanced Audit module before this date.
Below are 7 steps to complete:
1. Transfer Your Audit Scoring Types
- To start, re-create your existing Audit Types in the new Audit Scoring Types section of Administration.
- Audit Scoring Types need to be created before you can transfer your Audit Templates.
- We have guidance on how to build new audit scoring types available here:
2. Review and Download Existing Audit Templates
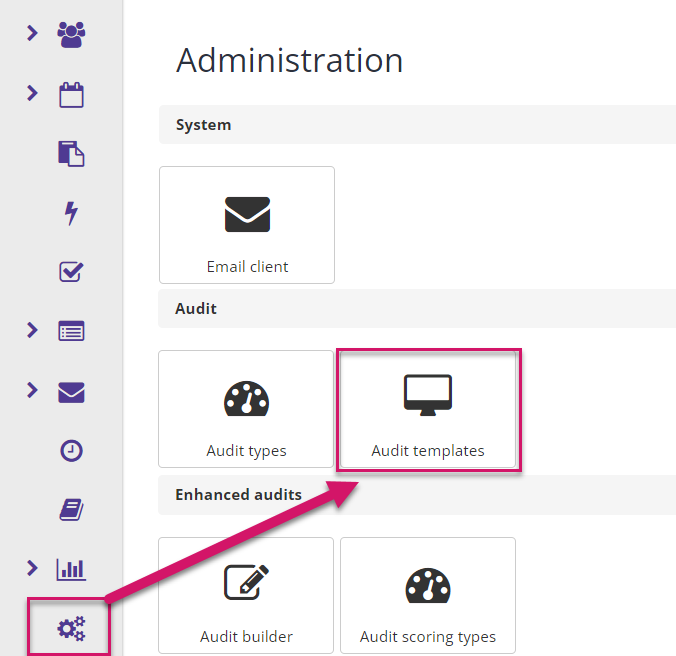
- Log into your Radar Healthcare system
- Go to the Administration > Audit Templates
- We recommend checking the character limit on your Section and Requirement names before transferring. For audit version 2 these are capped at 150 characters.
- In audit version 2 you can add information boxes within the audit itself which may enable you to shorten existing names and provide further guidance within the audit itself. Please see our guide on Info boxes here.
- TIP: You can actually skip this step and go to upload your audit into V2. During this process the system will clearly signpost any Section or Requirement names which exceed the character limit which may help you.
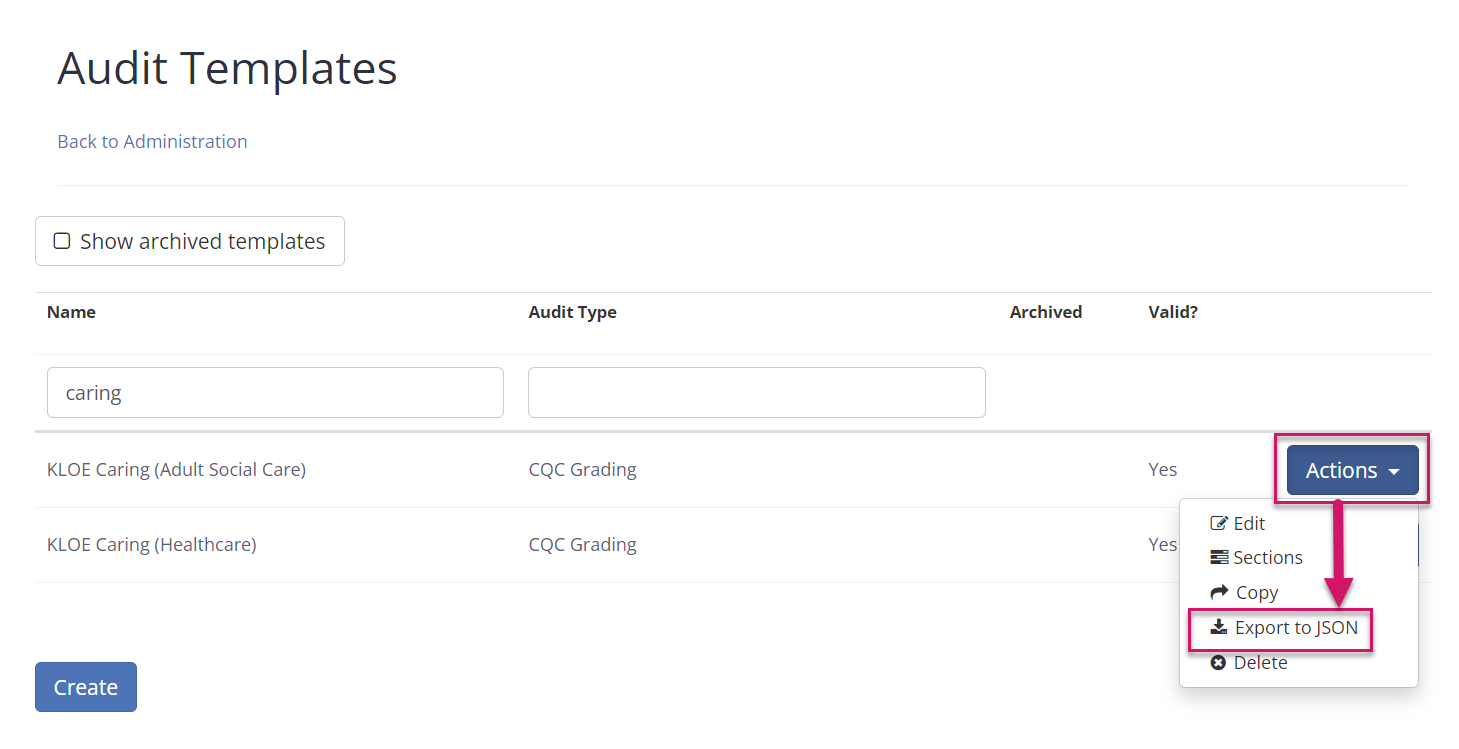
- Next to an audit template you want to transfer, click ‘Actions’ > ‘Export to JSON’ option.
The system will download a JSON file that stores the configuration details of your audit template. - Save the file on your device. You do not need to open the JSON file.
3. Upload Audits to the Enhanced Audit Builder
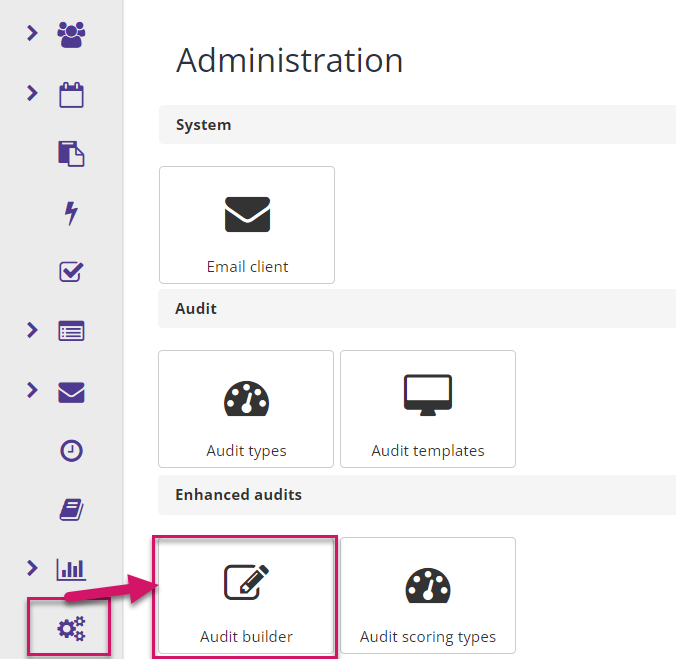
- Go to Administration > ‘Audit Builder’ under Enhanced Audits
- Click ‘Import Audit’ at the top.
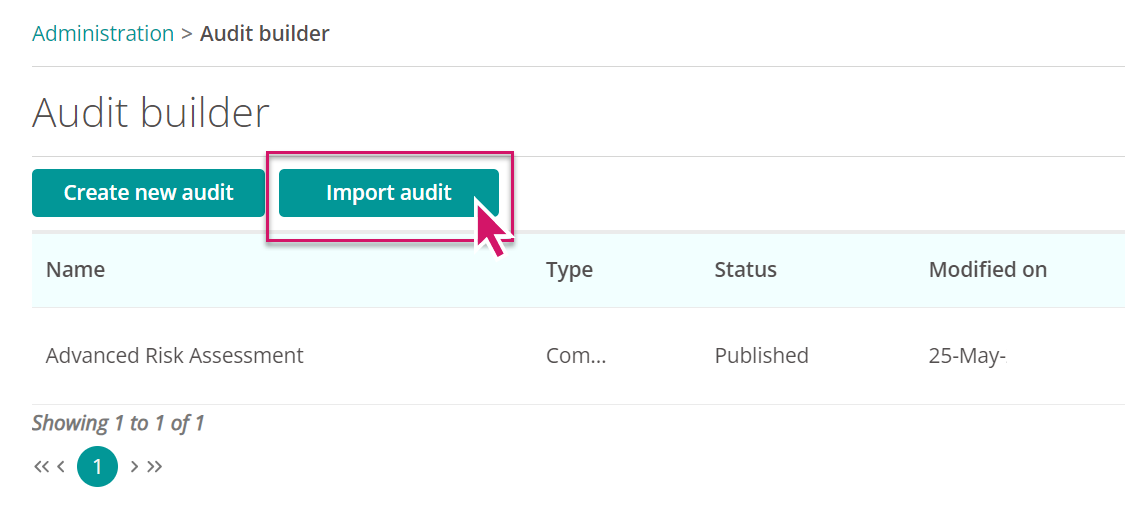
- Click on ‘Select audit template’ and find the JSON file you saved with your original audit details and ‘Open’.
- Select the correct ‘Audit Scoring Type’.
(If the Audit Scoring Type you want to use is not in the list, please go back to Step 1) - Optional - You can select any Tags to associate with your Audit. This allows you to categories your Audits. Tags are created in Administration > Tag Management.
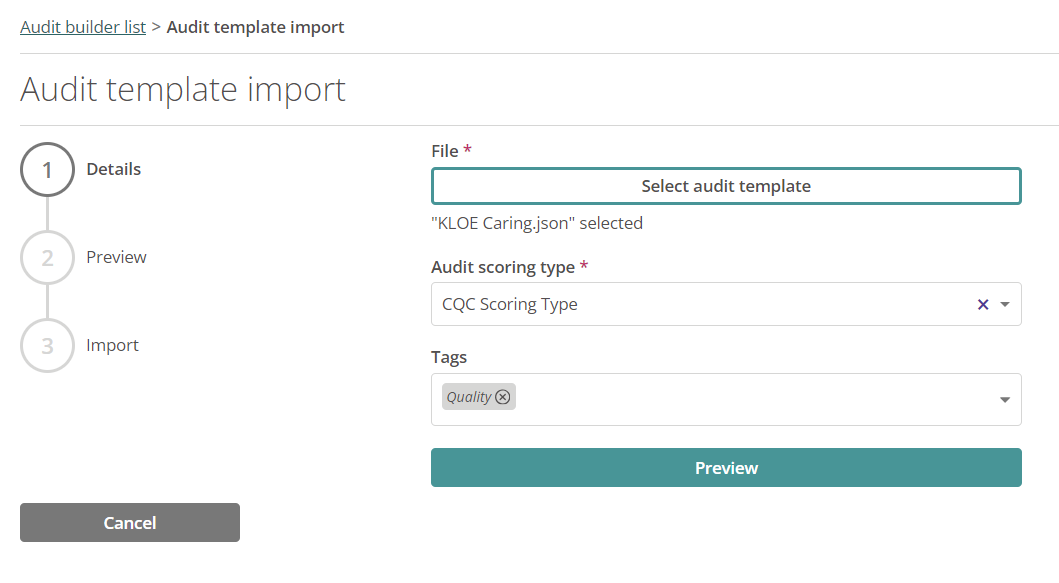
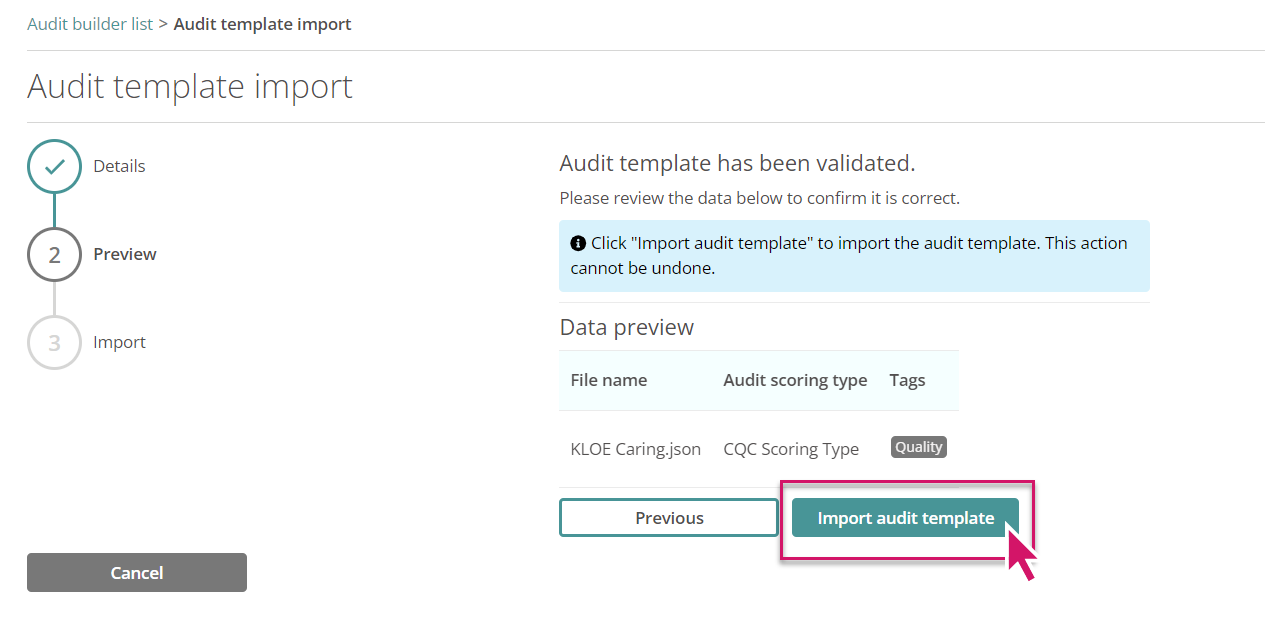
- Click ‘Preview’ and the system will check your audit import and highlight any errors (see Unable to upload due to title character limits).
- If the details validate correctly, click ‘Import audit template’ to complete the upload.
- Click on the newly imported audit and click ‘Publish’ in the top right.
- The audit is now available to use in Enhanced Audits.
4. Create New Audit Schedules
You will need to set up your new audit schedules within Enhanced Audits.
You can set up your new audit schedules to start at a future date (e.g. in 3 months’ time) to allow time for:
- staff to be prepared for the change
- permissions to be enabled
- old audit schedules to be deleted.
To set up your new schedules go to Enhanced Audits in the left hand menu > Schedule List.
Guidance on creating audit schedules can be found here:
5. Notify Your Staff of the Update
We recommend notifying the staff that complete audits in Radar when the move to Enhanced Audits will take place.
You can find resources about using Enhanced Audits here:
https://community.radarhealthcare.com/completing-an-audit-new-and-improved-audit-112
6. Enable Enhanced Audit Permissions
Before the go live, enable permissions for relevant user roles in Administration > Access Control.
You may want to remove permissions for the the old Audit module to prevent this being used after you have moved to Enhanced Audits.
More guidance on available permissions here:
7. Go Live and Delete Old Audit Schedules
Once you are Live with the new audit schedules you can delete your old audit schedules.
Deleting the audit schedule will stop any further tasks being created.
Data for historic completed audits will be retained for reports.
More guidance on deleting an old audit can be found here:
If any old audits have been started, they will either need to be Abandoned or completed, then deleted.
FAQs
Unable to upload due to title character limits
The new and improved audit tool does have character limits on the:
- Audit Template Name - 150 characters
- Section Title - 50 characters
- Question Group (previously known as ‘Requirements’) - 50 characters
- Question - 500 characters
If you receive this error message when trying to upload your audit, please edit the original template to reduce the character limit on the Audit Sections or Requirements and try downloading and uploading the audit template again.
Guidance on editing a audit can be found here: