Please note - this user guide is in reference to the Enhanced Audit functionality.
Reading time 4 mins
Introduction
Create unique schedules for your audits. Select the frequency, location and user or a group of users with the same role who will complete the audit. You may wish to audit a specific subject. Or include a workflow to go with the audit questions.
Scheduling an Audit
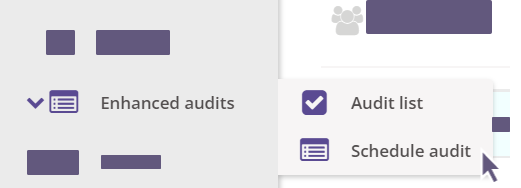
- Select Enhanced Audits and Schedule audit

- Here is a list of all your scheduled audits.
- Select Schedule an audit/s to get started. There are two pages.
Schedule Details
- Audit Name - choose the audit you wish to schedule using the drop-down list.
- Frequency - how often should this audit reoccur?
- Repeats Every - is this a one-off audit? Or is it a specific number of days, weeks, months, or years?
- On - when do you wish the audits to be completed by? For example, should your audits be completed by the last day of the month? This will scheduled them accordingly.
- Schedule Starts - which date should this audit start? The system will scheduled your audits on or after this date, based on when you wish them completed by (see step above). For example, if you have set the audit to be completed on the first day of each month and the start date is the 15th May the first audit will scheduled for the 1st June.
- The limit on the end date is based on the repetition of the audit.
- Repeats daily - the end date can be up to 365 days in the future.
- Repeats weekly - the end date can be up to 52 weeks in the future.
- Repeats monthly - the end date can be up to 36 months in the future.
- Repeats annually - the end date can be up to 5 years in the future.
- The limit on the end date is based on the repetition of the audit.
- Schedule Ends - when should this schedule end? Select a specific date or number of occurrences. Once complete please reschedule as necessary. We recommend creating an action to remind you of this.
- Pending Period - the time before the start date when the status changes from "planned" to "pending" and appears on the user's dashboard.
- None – Recommended setting for daily audits. The audit will change to ‘Pending’ and appear on the assigned user’s dashboard on the due date. Users can start the audit before the due date from the Audit List.
- Day/Week/Month/Year - How long before the due date will it appear on the responsible user’s My Tasks dashboard? For example, audits due at the end of the month may have a pending period of 1 month to ensure they appear on the auditors’ dashboards at the start of each month.
- “Can start within the pending period?”
- YES - Recommended setting for monthly audits. The audit will appear on the responsible user’s My Tasks dashboard at the start of our chosen pending period (e.g. 3 days before it is due...). The audit can be complete within that period. Any future scheduled audits can also be completed within their own pending period and not before.
- NO - The audit will appear on the responsible user’s My Tasks dashboard at the start of our chosen pending period (e.g., 3 days before it is due...). The audit cannot be started until the due date is reached. Any future scheduled audits cannot be started until their due date is reached.
- Schedule Name - this will populate from your choice of audit and frequency. Edit the name to ensure it describes the purpose of the schedule.
- Locations - choose the range of locations you are auditing as part of this schedule.
- Auditor/s - who will be carrying out the audit?
- Person - select a named person at that location who can complete the audit.
- Role - select a role at that location. It will assign the audit to the individual first assigned that role in the system. Other users with that role will be able to reassign the audit to themselves to complete.
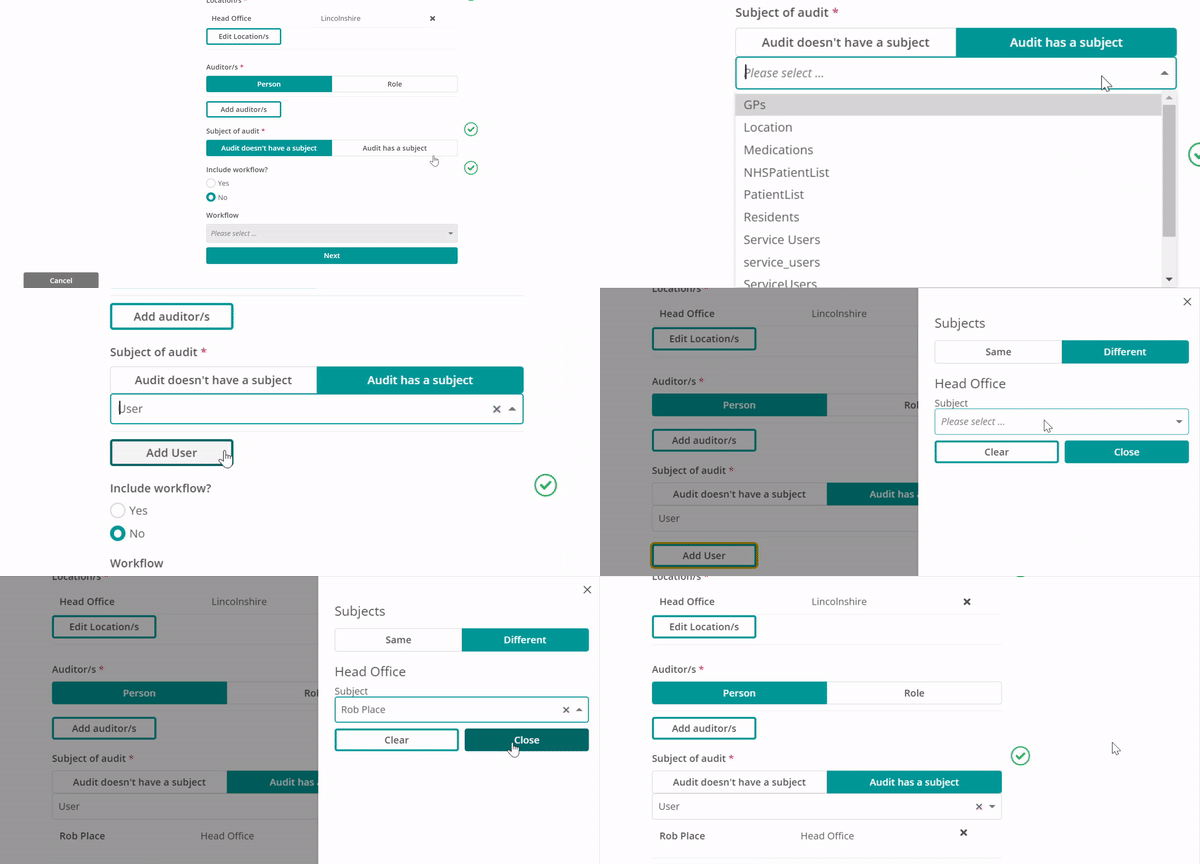
- Subject of Audit - are you auditing a specific subject matter? Here are your Custom Lists of data and you can choose a specific subject from one of those lists to audit. This will be visible to the user completing the audit, and when reporting on your audits.

- Workflow - this feature allows you to add further steps to your audit to include elements not on your built audit.
- Action Plan - choose this option to have a mandatory Action Plan step added at the end of your audit. This step will highlight all the questions failed on the audit and will ask the user to create or link existing actions against each step.
- Authorise - the authorise workflow step allows for additional assurances that the audit as a whole is complete. This links to the ‘Authorise’ permission and will assign to the line manager of the Audit Owner by default. It can be manually reassigned to any user with the “Authorise” permission within the scope of the audit and/or the workflow itself can be updated to assign to the Audit Owner if desired.
- Action Plan and Authorise - this adds the authorisation workflow step along with an Action Plan step.

Summary
- Here is a summary of the schedule you have designed.
- Select “previous” to go back a step and make any amends you need.
- Select Schedule Audit to finish your schedule.
View and Amend Schedules
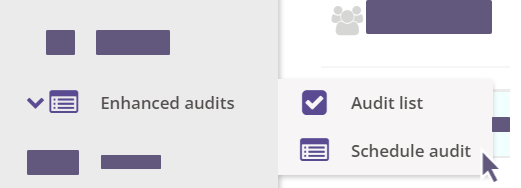
- Select Enhanced Audits and Schedule audit

- Here is a list of all your scheduled audits.
- The table list highlights the key information of each schedule. Select any of your schedules to make any changes you require.
Please Note - the functionality to amend an existing schedule is under development.

- When viewing the Schedule List page, you will see the overall schedules line by line.
- If you click into the relevant schedule, you will be able to see the individual location details.
Deleting a Schedule
- On your list of schedules select the three dot-menu after the one you wish to delete.
- There are three options:
- Delete schedule only. This option deletes the schedule, but all the audits already assigned remain in place.
- Delete scheduled audits. This option keeps the schedule but removes all the audits that have not yet started. (Any audits in-progress or completed will remain and can be Abandoned individually).
- Delete both. This option removes both the schedule itself and all the audits assigned.

Scenario
-
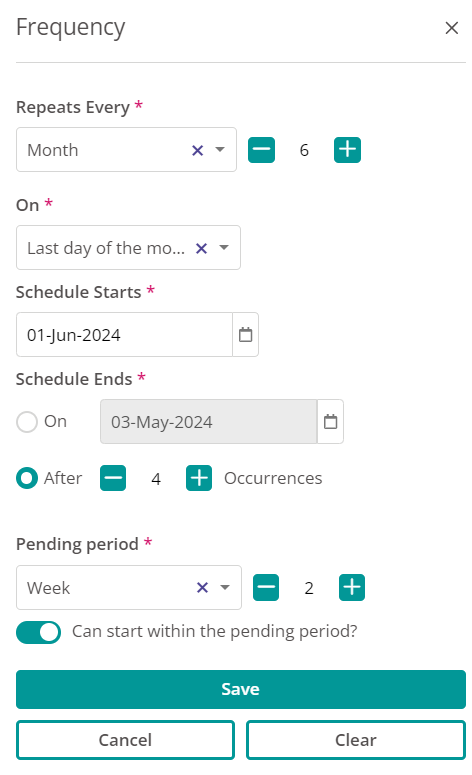
We want to schedule a 6 monthly audit, starting from the beginning of the next month. This audit needs to be completed on the last day of the month it is due in and we want our Auditors to have 2 weeks to completed it. We wish this to run for 2 years before we review.
-
Repeats Every - we have chosen Month and 6 to ensure it repeats every 6 months.
-
On - we have chosen ‘Last day of the month’ to ensure when it schedules the audit it will always be for the end of the month it is due.
-
Schedule Starts - we are currently in May, so we have chosen 01/06/2024 so the audit schedule starts from the next month.
-
Schedule Ends - we have chosen 4 occurrences to ensure it runs for 2 years.
-
Pending period - we have chosen ‘Week’ and 2 so this audit will turn pending and go on the Auditors’ dashboard 2 weeks before it is due. We have chosen to allow them to start within the pending period to ensure they can start work on the audit 2 weeks before it is due date.
-

FAQs
Can we relate the audit to something specific within a location? E.g. A Member of Staff? Or Service User?
- Yes, please use the subject function to enable this. Your User list from Radar Healthcare will be available automatically. All your custom lists will also appear which include Service Users, Medication Lists, etc. If you require a new list, please create those in the system and they will appear as potential subjects.

