Reading time 6 mins
- To upload a new document in Radar Healthcare, select Documents from the left-hand menu.
- Here you will see all current folders in your system. All documents must be saved into a folder. Select the folder you wish to add your document into or add a new folder (you can add sub-folders if required).
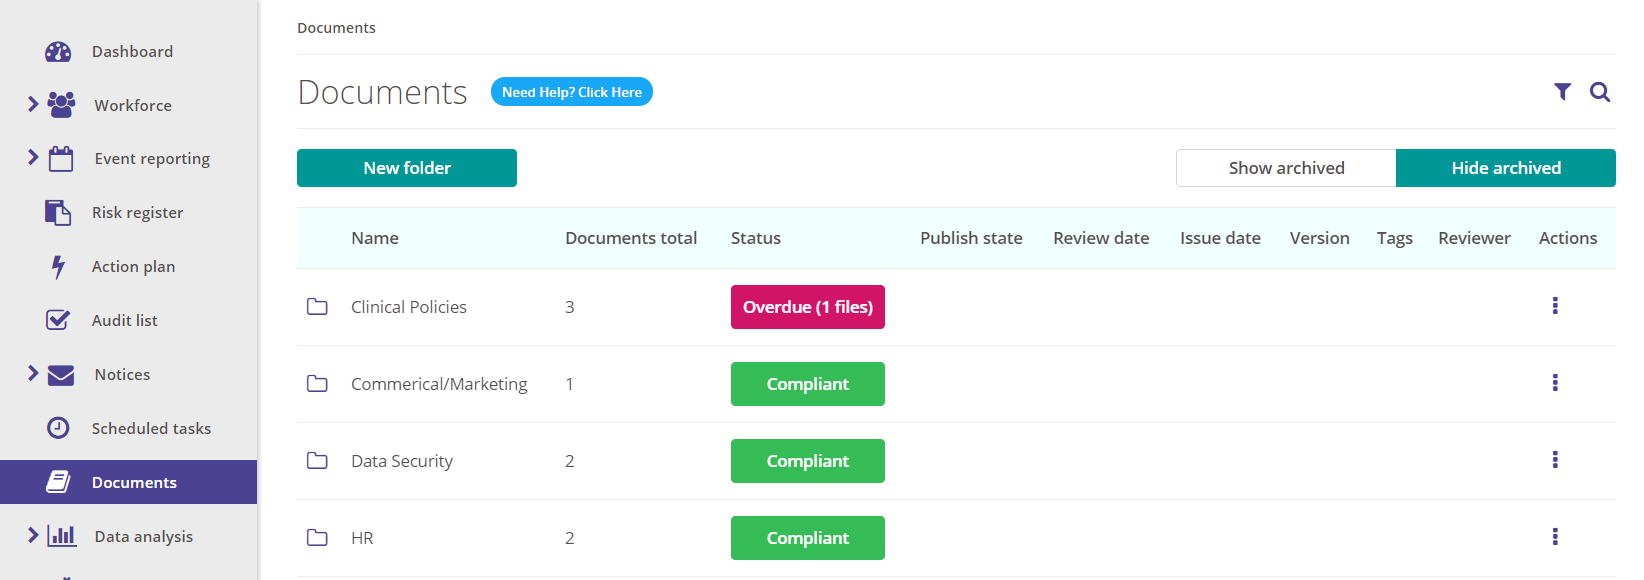
- To add a new document, from within the selected folder, click Upload document.
- You will now be taken to the Document Details screen. On the left hand side, you will see the upload process steps listed. These will go green as we complete the document details.
There can be up to six steps to upload the new file:
1. Document Details
Enter the document details by filling in the fields displayed as follows.
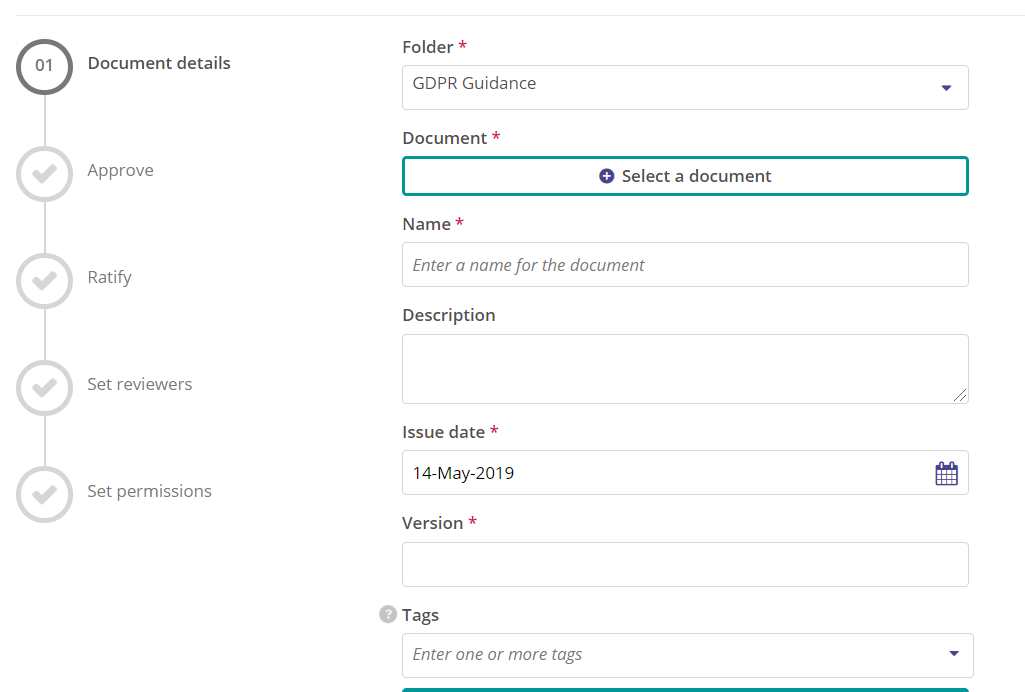
- Folder – The folder where the document is to be held (this defaults to the current folder)
- Document – Upload the document
- Name – The name you want to give the document when viewed by your users
- Description – A description of the document if required (optional)
- Issue Date – The date the document was issued (defaults to today’s date)
- Version Number – Free text version number for the document
- Tags – Tags help you to filter and search for different documents
- Please note, the type of documents able to be uploaded are restricted to the following:
- doc
- docx
- jpeg
- jpg
- mp3
- mp4
- msg
- png
- ppt
- pptx
- txt
- wav
- xls
- xlsm
- xlsx
- xml
- Size limit is 20MB
Once you have entered all the details, select ‘Next’ at the bottom of the page.
2. Approve
- If your system has the document approval step activated, you will be asked if approval is required before the document can be published. (If your system does not use Approval, you will skip this step)
- The document will default to Approval not required. If this document can be published without a formal approval process, select Next.

- If the document does need to go through a formal approval process, select Approval required to reveal the approval details screen.
- Complete the Approval details form. The fields displayed are as follows:
- Choose the roles for the approval group - select the roles that you would like to be able to view the document before it has been approved (optional). If only the Approver and users with the "Admin User" permission for documents in Access Control need to view the document before it is approved, leave this blank.
- Approver - the individual who is responsible for approving the document. This user will receive a notification on their dashboard once the document is due to be approved.
- Approval date - the date by which the document must be approved
- Review Period - how far prior to the approval due date will the document flag as "Pending" and the approver notified on their dashboard that they have a document to be approved
- Once you have entered all the details, click Next at the bottom of the page.
3. Ratify
- If your system has the document ratification step activated, you will be asked if ratification is required before the document can be published. (If your system does not use Ratification, you will skip this step).
- The ratification allows for an additional level of "sign off" prior to a document being published and made available to the sider user base.
- The document will default to Ratification not required. If this document can be published without a formal ratification process, click Next.

- If the document does need to go through a formal ratification process, select Ratification required to reveal the ratification details screen.
- Complete the Ratification details form. The fields displayed are as follows:
- Choose the roles for the ratification group - select the roles that you would like to be able to view the document before it has been ratified (optional). If only the Ratifier and users with the "Admin User" permission for documents in Access Control need to view the document before it is ratified, leave this blank.
- Ratifier - the individual who is responsible for ratifying the document. This user will receive a notification on their dashboard once the document is due to be ratified.
- Ratify date - the date by which the document must be ratified
- Review Period - how far prior to the ratify date will the document flag as pending and the ratifier be notified on their dashboard that they have a document to be ratified
- Once you have entered all the details, click Next at the bottom of the page.
4. Set reviewers
- You will now be taken to the Review details page. If a document needs to be reviewed, e.g., if a policy need reviewing and updating annually, Radar Healthcare can send a reminder to ensure that this happens on time.
- The document will default to No review required. If this document does not need to be reviewed again at a future date, click Next.

- If the document does need to be reviewed again in the future, select Review required to reveal the review details screen.
- Complete the Review details, the fields displayed are as follows:
- Reviewer – who is responsible for reviewing the document. This user will receive a notification on their dashboard once the document is due to be reviewed.
- Review date – the date by which the review is required to be completed
- Review Period – how far prior to the review date will the document flag as pending and the reviewer be notified on their dashboard that they have a document to be reviewed.
- Once you have entered all the details, click Next at the bottom of the page.
5. Set permissions
- The last step in adding a new document is the document permissions.
- If you are happy to leave the document permissions as they are set in Access Control (i.e. all users with the "Basic User" permission can view all documents, only users with the "Admin User" permission can manage documents) then leave these fields blank and click Complete at the bottom of the screen. (To set your document permissions in Access Control, please refer to this guide)
- To set specific permissions for each document, for example to limit who can see certain documents or to allow users with "Basic User" permission in Access Control to be able to manage documents, follow the steps below.
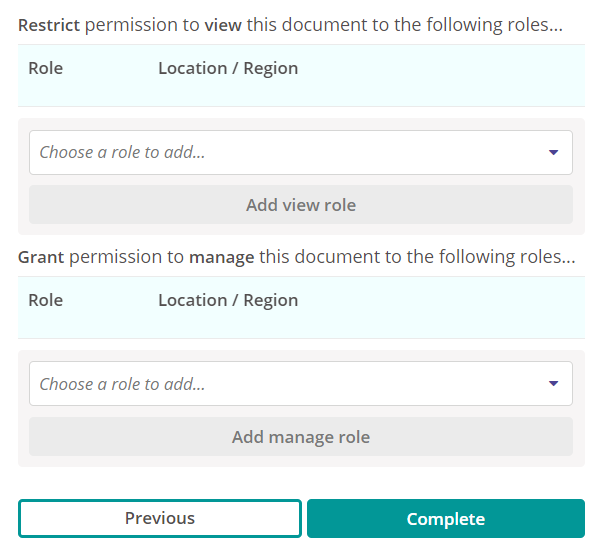
- The first option allows you to set who can view the document once it is published. Select the relevant Role from the drop down.
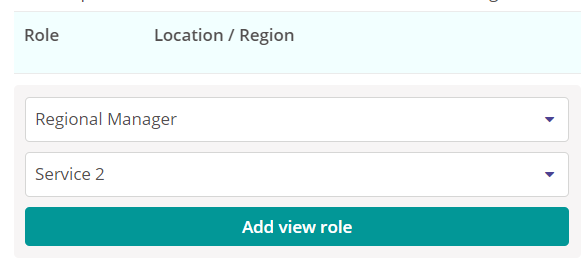
- If the role you have selected is a Location or Region role, you can further define who can see the document by selecting the Location/Region that can view the document. For example, if you have specific policies for different sites, you can ensure there is no confusion over which policy applies to which site, by restricting those who can see the document by the relevant location.
- Once you have selected the Role and Location/Region (if applicable), click Add view role to save the permissions. The rule will display and can be removed using the dustbin symbol if added in error.
- Repeat this as required until you have set the required permissions.
- Remember, if you wish for all your users to be able to see the document, leave the drop down blank (as it defaults upon first reaching the screen) and the master Access Control permissions will be applied.
- Next, you can set who has access to manage the document.
- If you wish to allow users with "Basic User" permission in Access Control to be able to manage documents, you can grant them permission to manage individual documents here. Select the Roles you wish to grant access to from the drop down. If the role you have selected is a Location or Region role, you can further define who can manage the document by selecting the Location/Region.
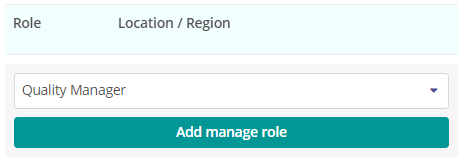
- Click Add manage rule to save the permissions. The rule will display and can be removed using the dustbin symbol if added in error.
- Once your permissions have been set, click Complete.
6. Publishing the Document
- If your document did not require approval or ratification, then it will automatically flag as Published upon completing the steps above.
- If your document requires approval and/or ratification, this must be completed before the document will flag as published. Until these steps are completed it will show as "Draft". (Please refer to the relevant guidance for assistance in how to approve or ratify a document).

