
Reading time 4 mins
Introduction
An Enhanced Custom list can be created at any time you require one. Before starting, please consider the key fields of information you are wanting to capture about each item on your list. E.g., If it’s a list of Service Users, do you need to capture; first name, surname, DOB, and address? If vehicles do you need registration, manufacturer, etc...
When populating each item of your custom list you will be able to include these fields. When viewing your custom list the columns represent each field, and the rows represent each individual item.

Creating a new Enhanced Custom List
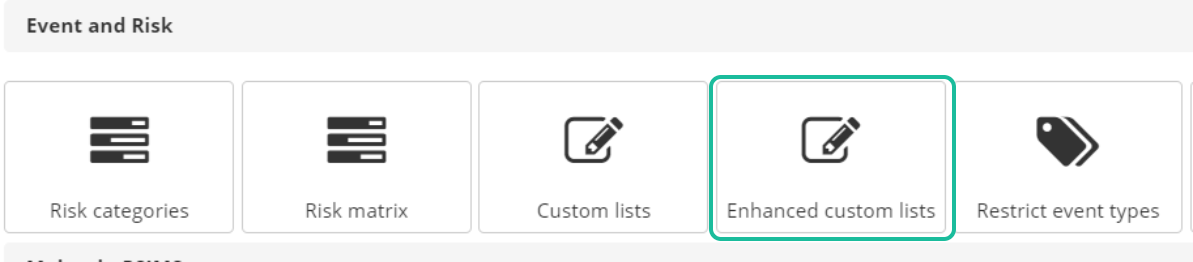
- Select Enhanced Custom List from the Administration menu under Event and Risk.
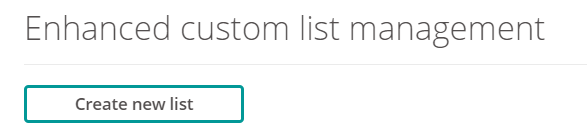
- At the very top of the page, select Create new list.
- Start by entering:
- Name of the list.
- This is the unique name given to the list and is only visible for administrators. This cannot contain any spaces or be edited in the future.
- Display Name.
- This is the name of the list seen by your users. It will show in both the Form Editor and Persons Involved.
- Name of the list.
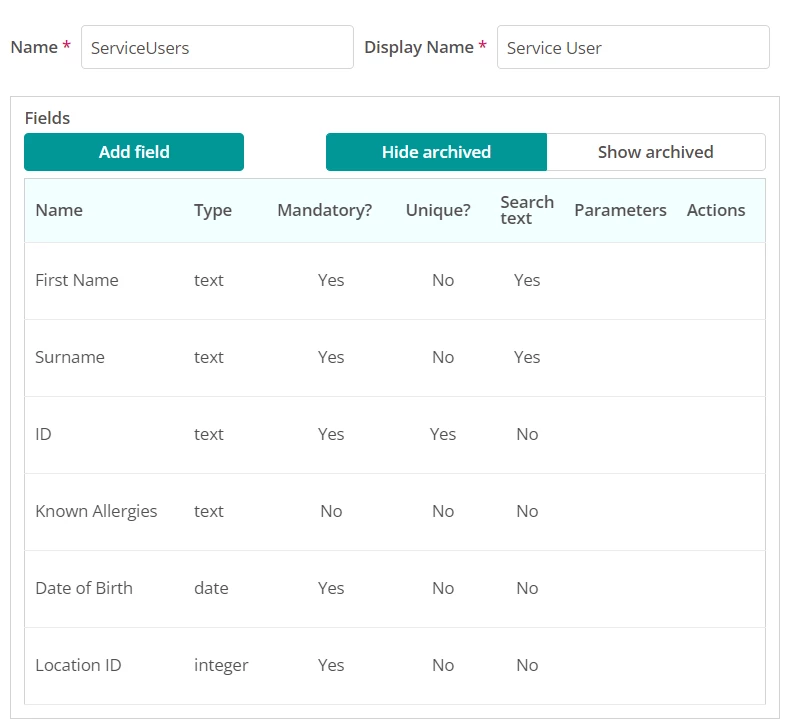
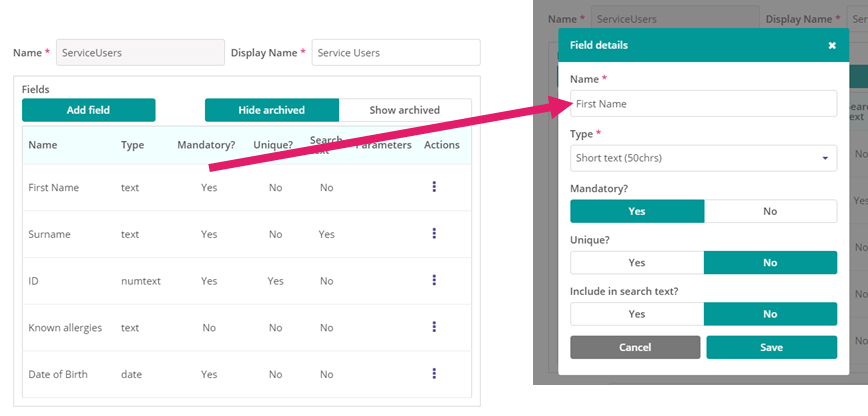
- Next create the fields for the data you wish to capture when adding items to your list. In this example, we are creating a list of our Service Users and wish to capture.
- First Name
- Surname
- ID
- Known allergies
- Date of Birth
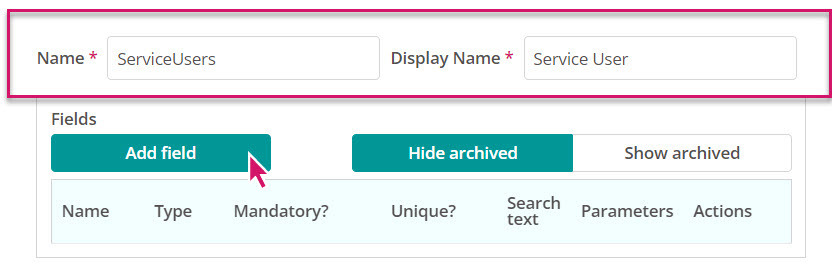
- Using the Add field button. Enter the key details of fields.
- Name. This is the title of the field you'll be capturing. E.g., First Name.
- Type. What is the format of this field? Will it be free text, a numerical value, date, email, select (create a drop-down list of options for people to select from), Boolean (yes/no option), or integer (whole numbers).
- Mandatory. Ensure this field must be populated on each custom list item added.
- Input mask. Used for NHS IDs to ensure they must follow the right formatting.
- Unique? Mandate each item added to this fields must be unique. Recommended for ID numbers but not for names.
- Include in search text? Allow the user to be able to search your custom list using this field.
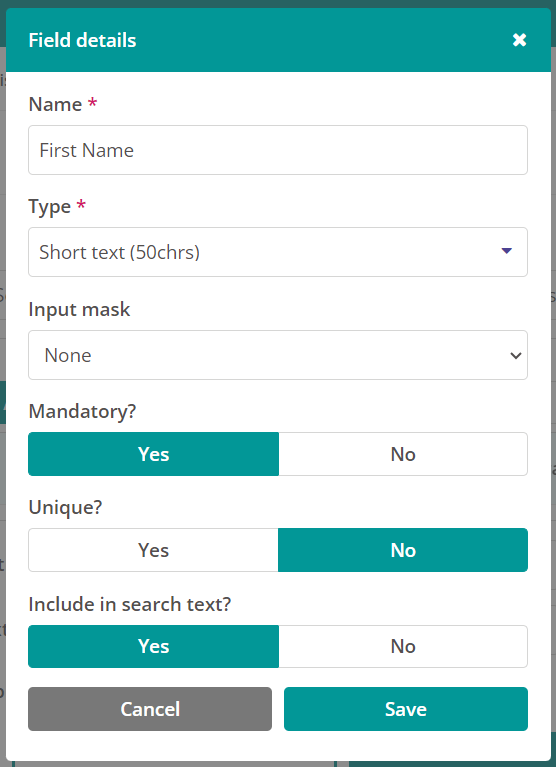
- Click Save to complete.
- As you continue to add the different fields that will be relevant for this Enhanced Custom List, they will appear in the table on screen.
- Below the table of fields, you will see some additional options.
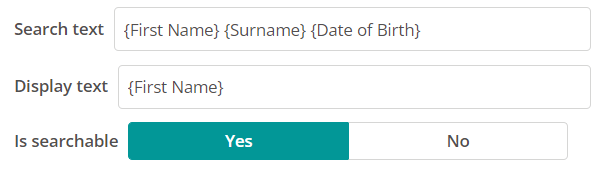
- Search text. Enter the fields to displayed to your users when they select items from this list on a form. This will also be the information displayed in Radar Healthcare when viewing the completed form.
- Each field Name should be in between curly brackets. E.g., {First Name} {Surname} {Date of Birth}. Top tip - separate the information using spaces which will ensure the information appears in an easy read format.
- Display text. What field/s should appear when exporting information from Radar Healthcare using the 'Reference Only' option. See Exporting an Event as a PDF as an example.
- Each field should be in between curly brackets e.g. {First Name}
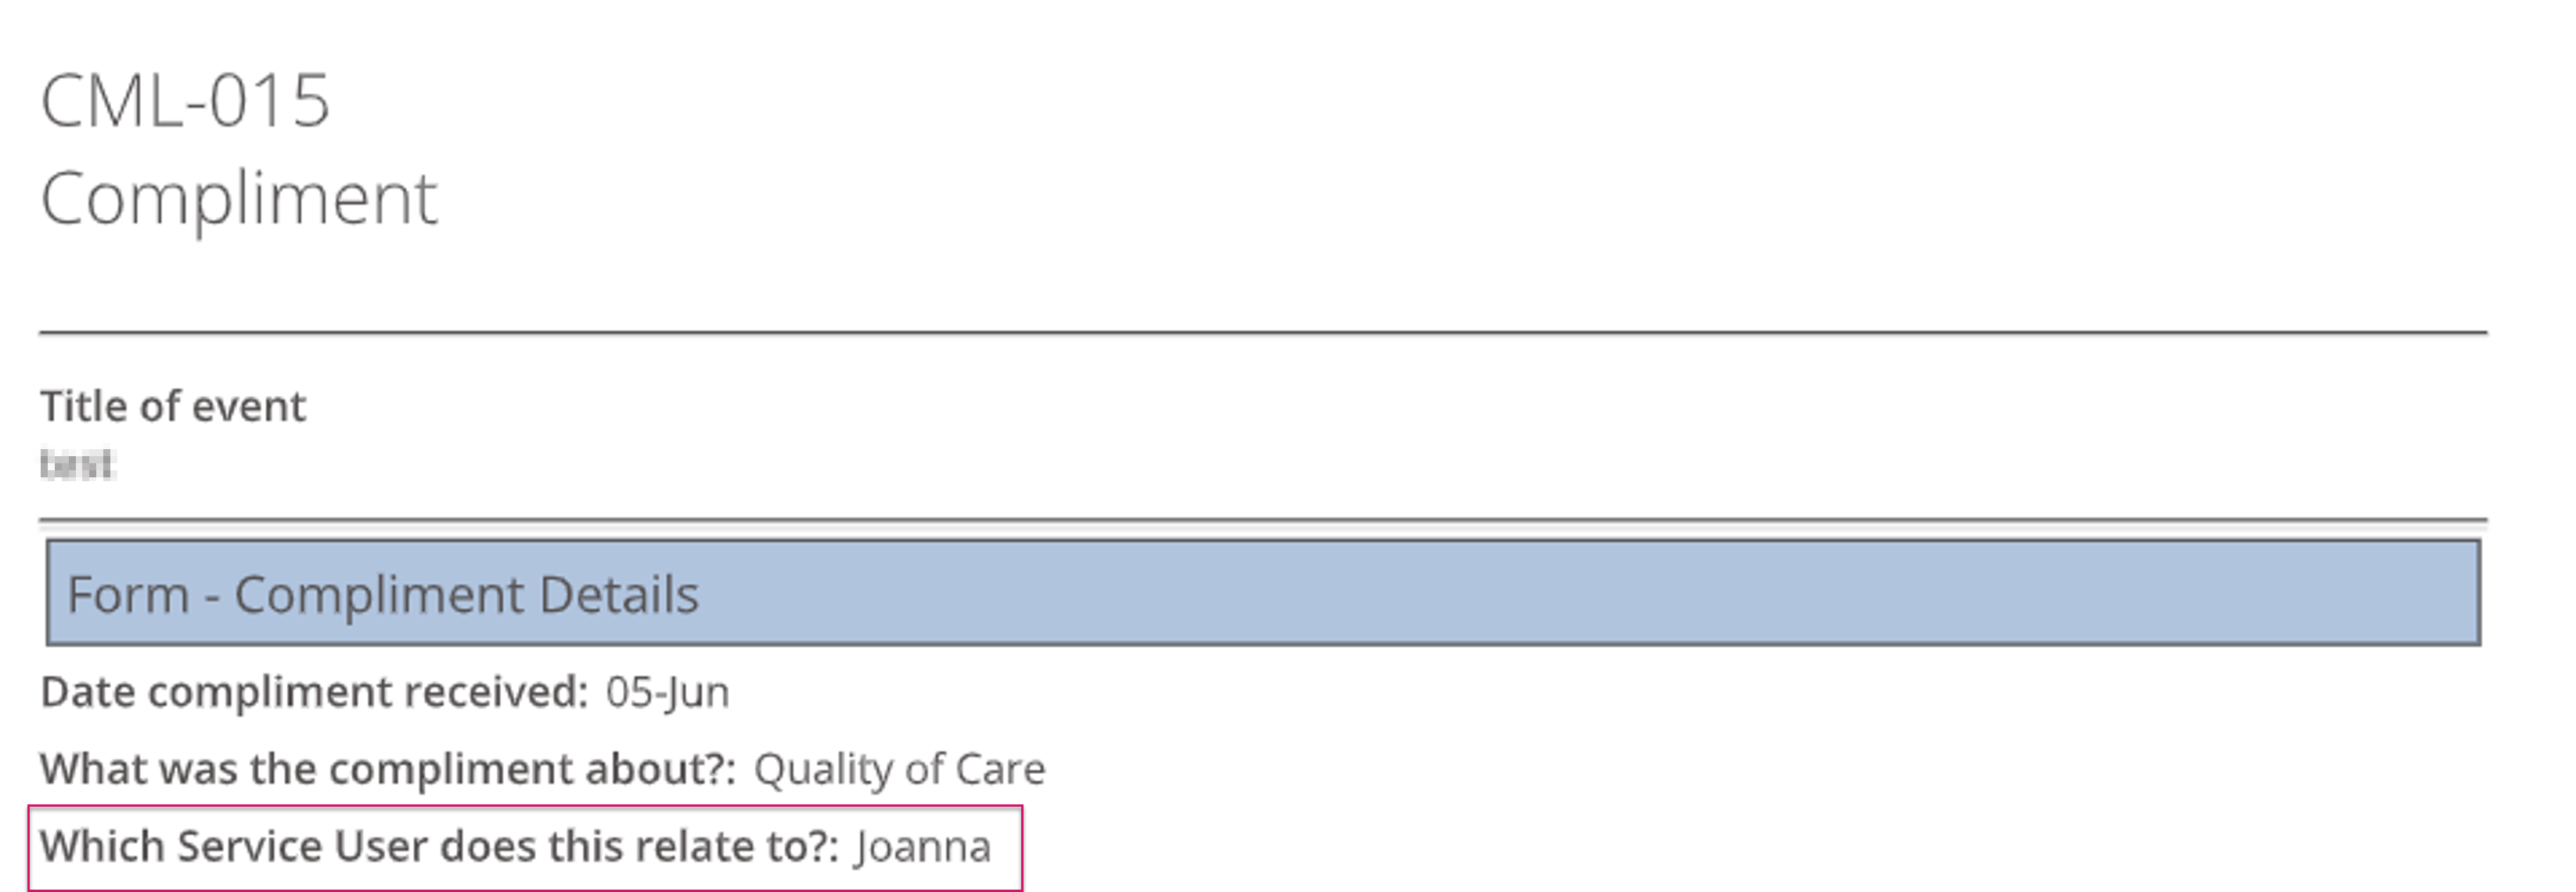
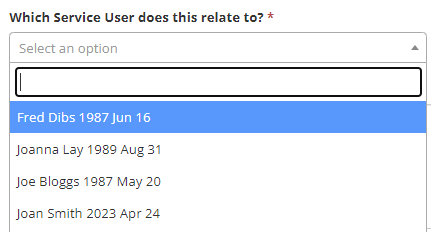
- Is searchable. Should this list be available on the Persons Involved function. This allows your users to search for an item on this list and find any events where it has been selected. E.g., search for all recorded events relating to patient 'Joanna Lay'.

Editing the fields on the list
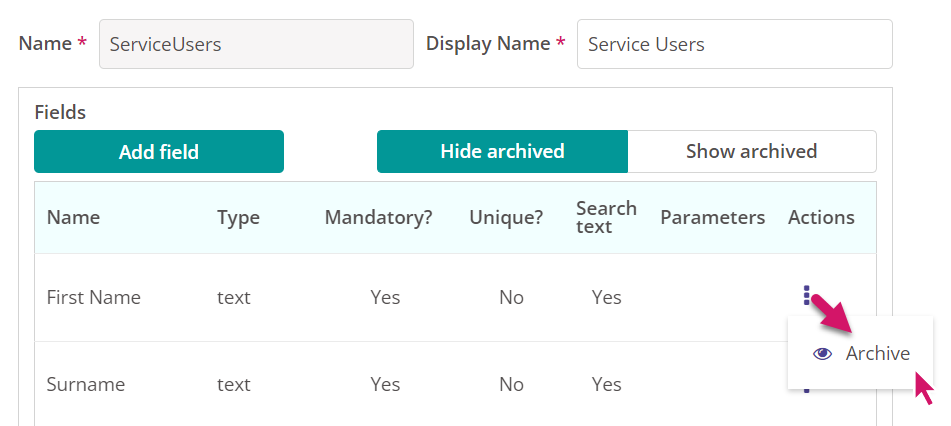
- Find the enhanced custom list and select the 3-dot menu next to its name.
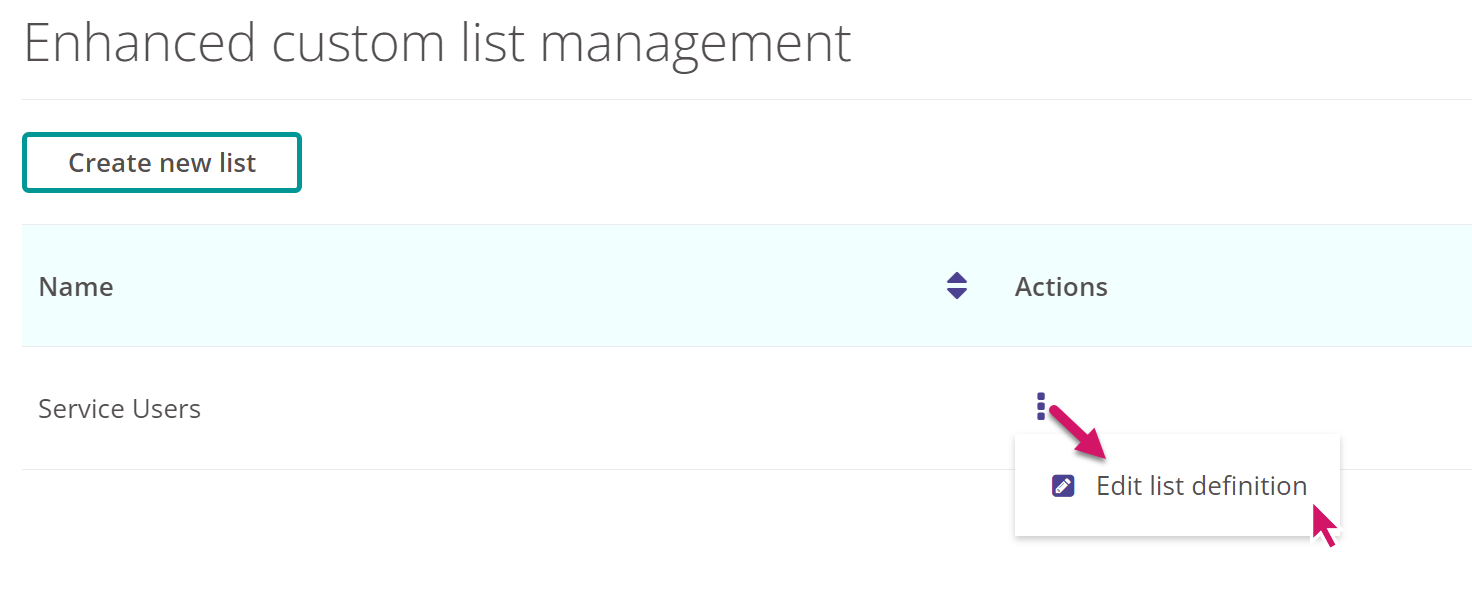
- From here you can archive a field using the 3-dot menu next to its name.
- Or select the name of the field in question to be brought back to the edit screen and you can make the changes you require.
- Select Save to make your changes Live.
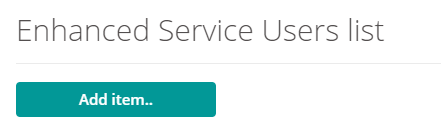
Populating your Enhanced Custom List
- Find and select the list you wish to populate.
- Select Add item to get started.
- The fields you have created previously will appear and simply add in the information to add your first item to the list.
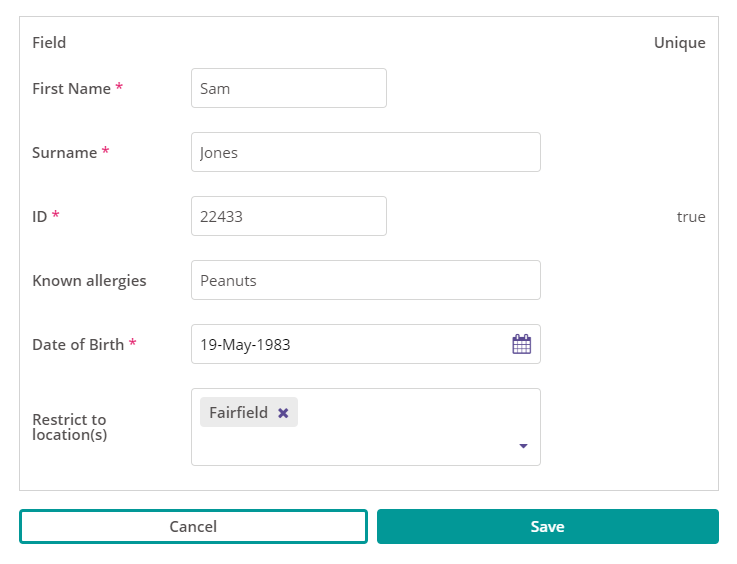
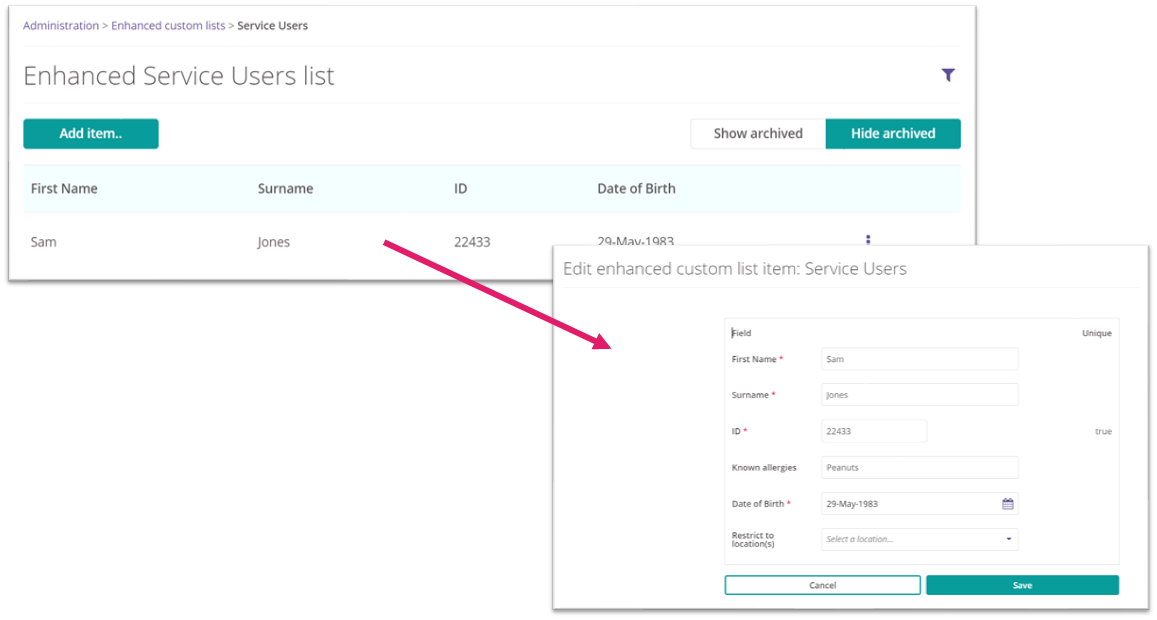
- You'll notice at the bottom of the list is a new option called Restrict to location(s) and this allows you to restrict which locations can access this item on the list. This is useful when logging events as it reduces and streamlines the number of items shown on the list.
- Select Save to add your item to the list.
Editing an Item on your Enhanced Custom List
- To make a change to an item on your list simple open the list in question and select the item which requires amending.
- Once your changes are made select Save to continue.