Reading time 8 mins
Introduction
Before managing your organisation's events, please ensure you fully understand your organisation's incident and risk management policy.
View all events
- Select Event Reporting and then Recorded events from the left-hand menu.

- You are now taken to the Recorded Events list. What you see on this screen depends on your system permissions, you may see all events across the Organisation, just those for your own Location or Region, or only those events logged by or assigned to you.
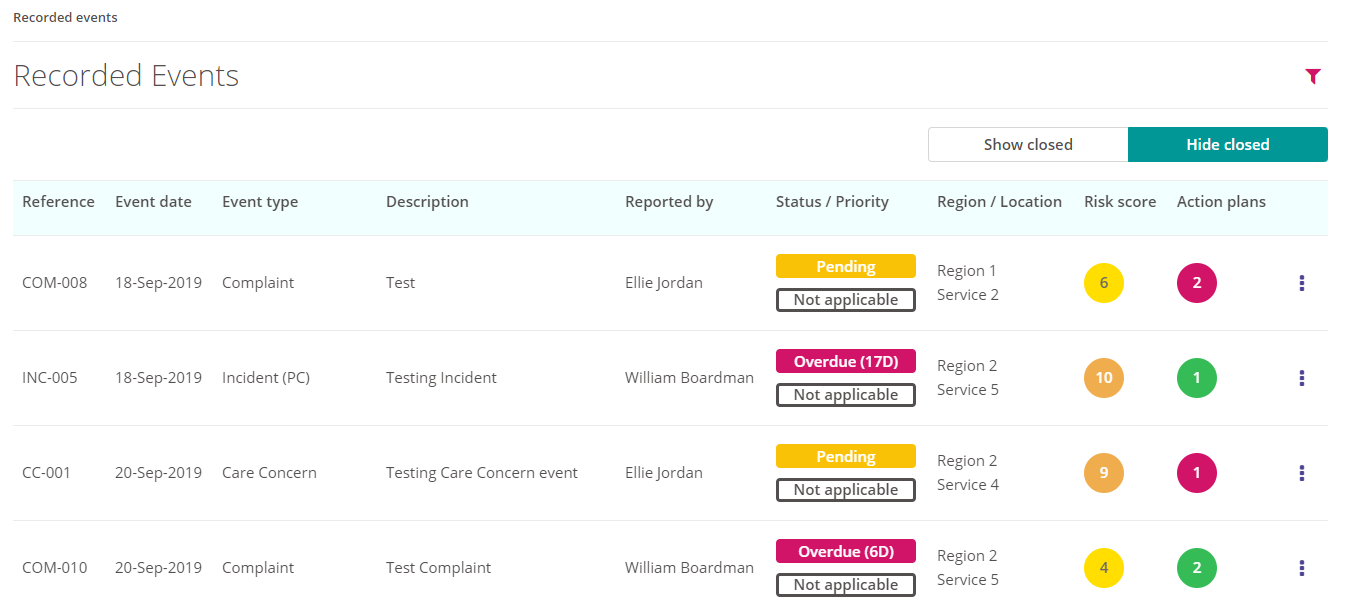
- You can filter on your events using the filter icon on the right-hand side of the screen to help you find the events you want to view.

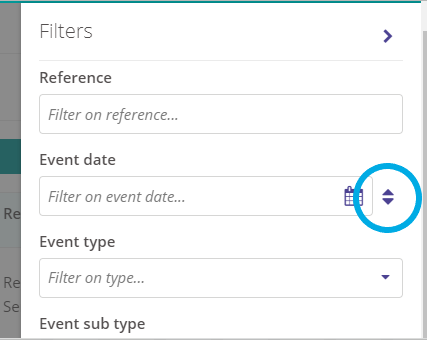
- You will be able to filter on the following:
- Reference = this is the unique event reference code. The prefix usually relates to the type of event, e.g., in our above example "INC" refers to "Incident". This code will be set for your organisation and may differ from our example above.
- Event date = when did the event take place (can be set as a range)
- Event Type = e.g., Incident, Complaint, GDPR etc.
- Event Subtype = some events may have a subtype; in which case you can filter on these here
- Description = you can search for keywords within the event descriptions to find similar or related events
- Reported by = who logged the event in Radar Healthcare
- Workflow Status
- Pending (the event reporting/investigation process is still in progress and all steps are still within the due date)
- Overdue (the event is not yet completed and at least one of the required steps is passed the due date)
- Complete (all steps within the event have been completed)
- Not Applicable (there are no workflow steps for this type of event)
- Priority = High, Medium, Low, N/A
- Region = the Region where the event took place (note, all events are logged at a Location, this will show all events logged at Locations that fall within the selected Region)
- Location = the Location at which the event took place
- Risk score = if the event has an "Assign Risk Score" step, this will show here and is filterable. Some events may not have a risk score, either if the score has not yet been entered, or if there is no "Assign Risk Score" step in the event.
- You can also sort the order of your events using the sort arrows to the right-hand side of selected fields, e.g., the date field or risk score field.
- To view an event, simply click on the Event in the Recorded Events list to be taken to the event screen.
Viewing Closed Events
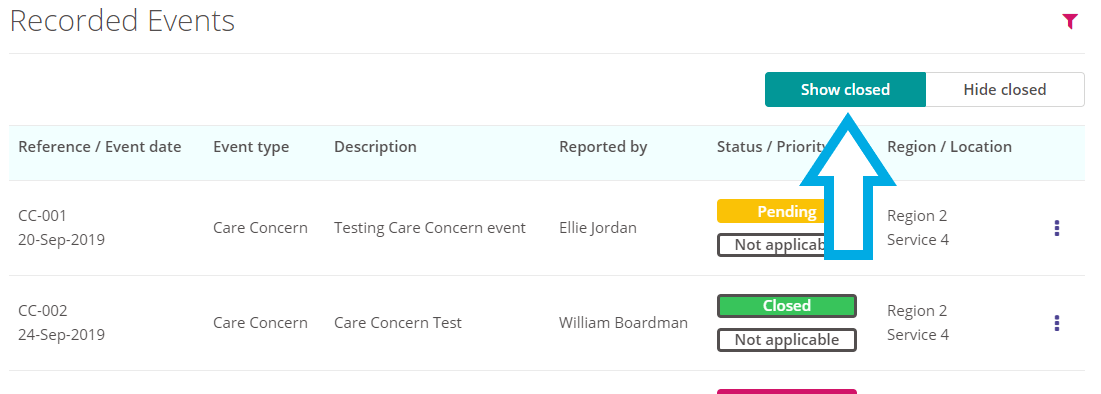
- Once an event is closed it will be removed from the default Recorded events list.
- To include closed events in your Recorded Events list, select the Show Closed option from the top of the screen.
Viewing Event Details
- You will now be taken to the event details page. Here you can see the event information, along with the current steps assigned.
- You can view a summary of everything submitted so far by selecting the Overview tab on the event table.
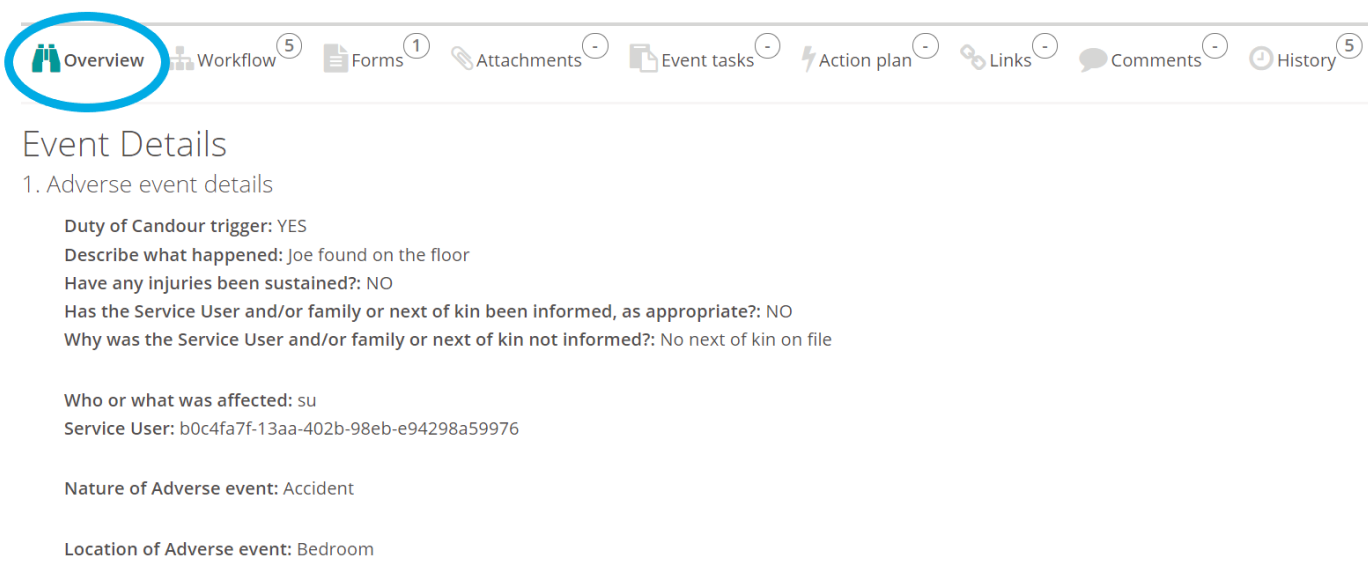
- If there is anything within any of the tabs on this table, this is indicated by a number.
- To view the information within any of these tabs, simply click into them from this table.

Editing Event Details
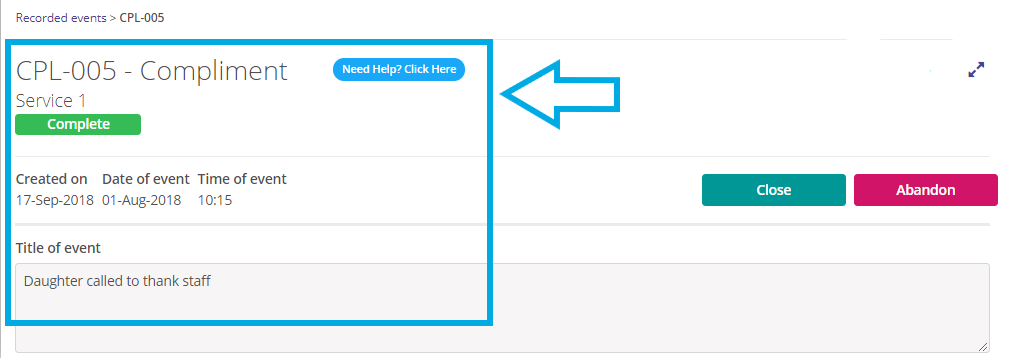
- The current event information is available at the top of the screen:
- Location of the event (in our example, this is Service 1) - can only be edited with the relevant organisation permissions
- Event Reference (in our example, this is CPL-005) - cannot be edited
- Type of Event (in our example, this is a Compliment) - cannot be edited
- Confidential status (only shows if the event is flagged as confidential)
- Created on date
- Date of event
- Time of event
- Title/Description of event
- Reported by
- To edit this information, select the double arrow icon on the top right-hand side of the screen.
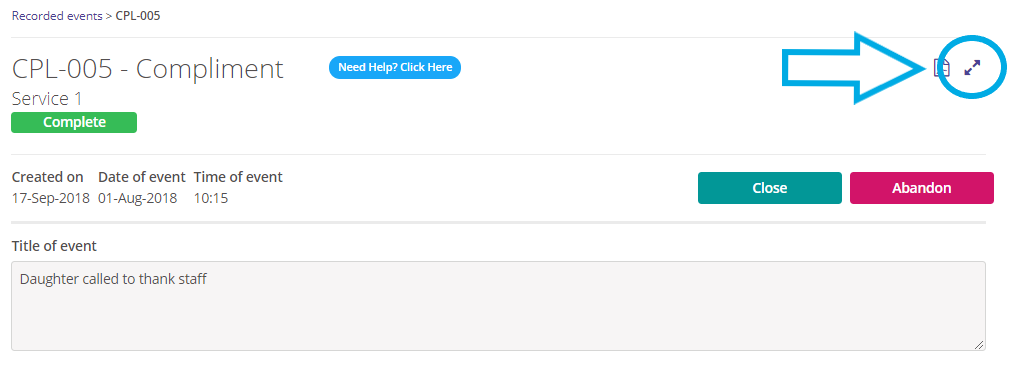
- This will open the editing screen and allow you to update the information as required - click “Save” to save the changes.
Viewing the Event History
- Within each event in Radar Healthcare a full history of activity is automatically recorded. This helps to ensure the integrity of the audit trail for each and every event. Every change that takes place is captured along with a timestamp and a record of who made the change.
- To view the Event History, from within an event itself, select the History tab from the events table.
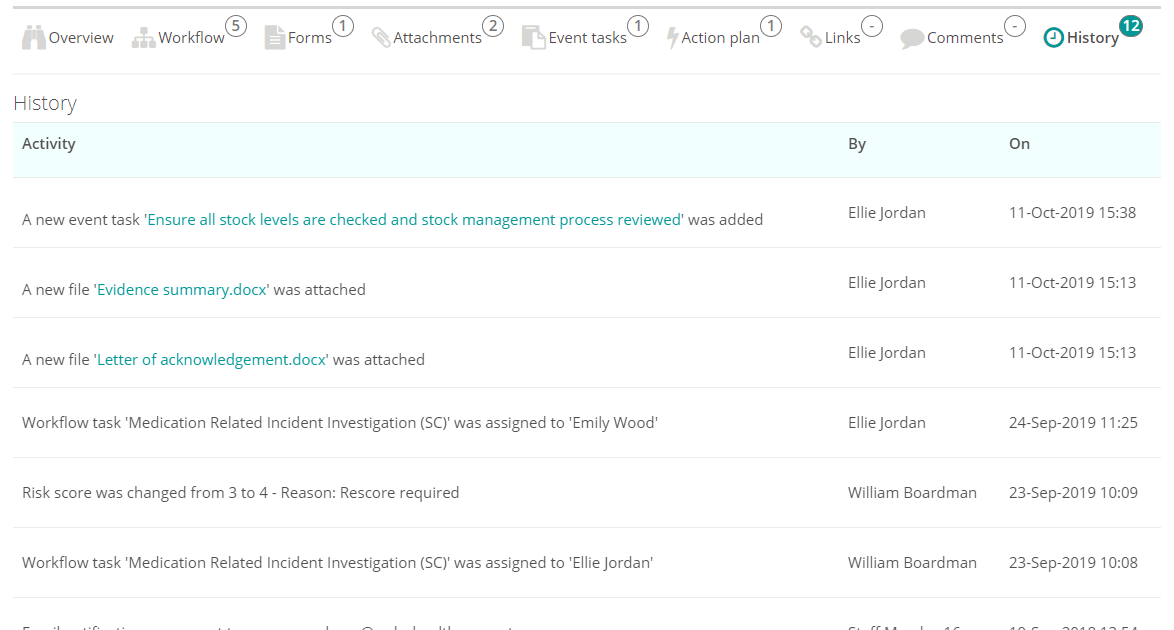
- Some items within the history are hyperlinked so that you can navigate directly to them, for example forms, tasks, and documents.
Actioning a Recorded Event
- Once an event has been reported it will trigger a set of automated steps that must be completed.
- If you have been assigned a step to complete, it will be flagging to you on your dashboard under My Tasks.

- Click into the event from this page to view the details submitted and to action your assigned steps.
- You will now be taken to the event details page. Here you can see the event information that has been entered so far, e.g. what type of event it was, where and when the event took place and other important details.
- You will also see all the different steps that now need to be completed along with who they are assigned to (you may only see things that are assigned to you, or you may be able to see steps that are assigned to other users. This will depend on your system permissions). These steps will be listed under the Workflow tab.
- To view a summary of everything submitted so select the Overview tab on the event table.
- To action any steps assigned to you, click to the Workflow tab on the event table, click into the step that you are required to action and complete the required information
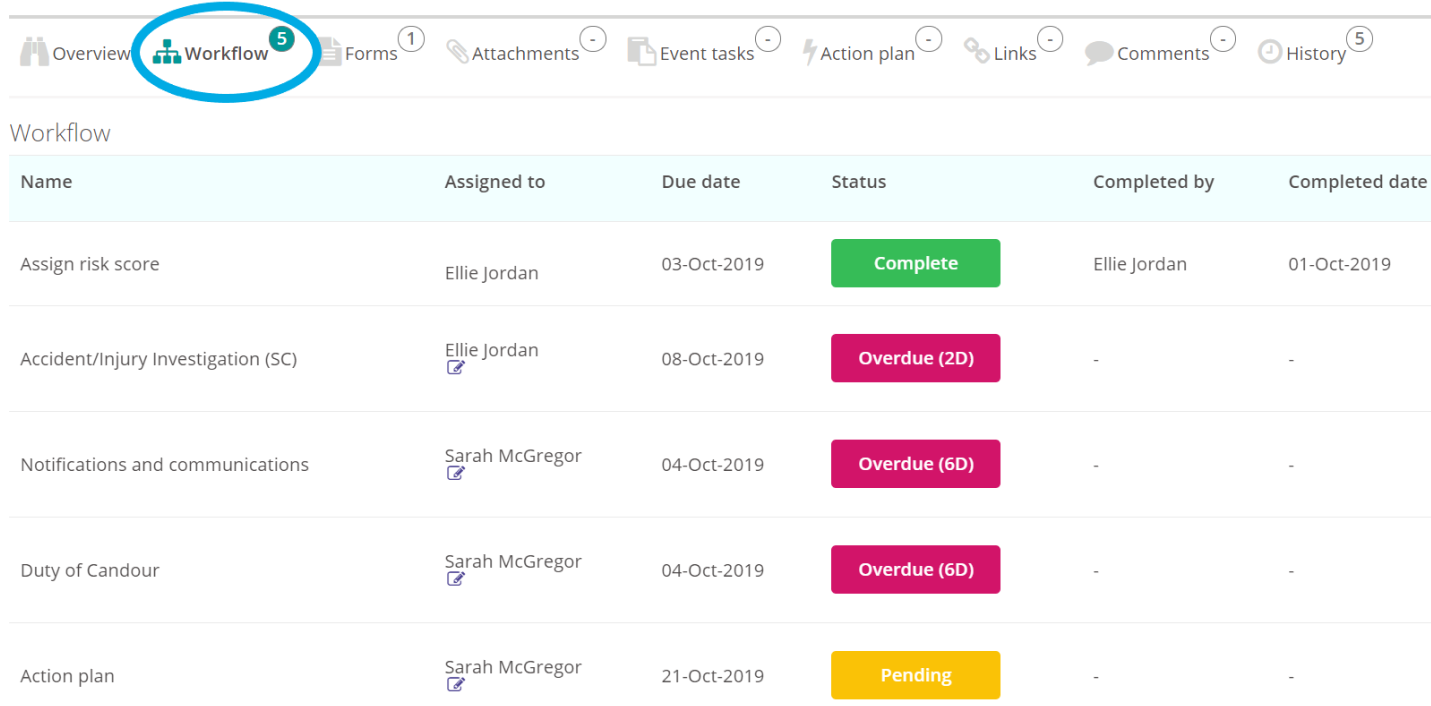
- How an event is set up is determined by your organisation, so every event will differ. Some events may reveal a number of steps that need to be completed, each of which can be actioned in any order as appropriate. For some events, the next step may not be revealed until the preceding step has been completed.
- To complete the event simply continue to complete the steps as they reveal. Ensure that you complete these within the given due date to avoid them becoming Overdue.
Adding an Additional Form to an Event
- If you need to log additional information alongside the information requested via the workflow forms, you can do so by attaching additional forms to an event.
- To add an additional form to an event, from within the event itself, select the Forms tab from the events table.
- Here you will see any forms already associated with this event. There will often only be a single form showing here, which will be the initial form completed by the user reporting the event, however you may see other additional forms already logged.
- To add a new form to this event, select a form from the drop-down list presented.
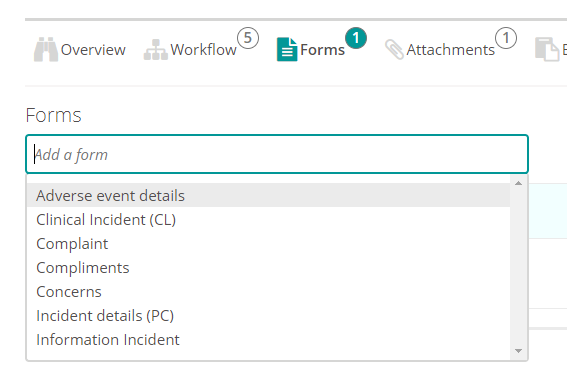
Complete the form details as prompted. Once complete, the new form will appear alongside any pre-existing forms for this event under the Forms tab.

- If you do not have the option to add a new form to an event or no forms appear in the drop-down list, then either you do not have permission to add an additional form to an event, or there are no forms associated with this event available for you to add.
Adding, Viewing and Deleting Attachments to an Event
-
Attachments can be added to events in two different ways.
-
When specifically requested as part of a form submission
-
Using the Attachments tab on the event table (this method is permission specific, so if you do not see this button, you have not been granted permission to upload documents in this way)
-
- Whichever method you use to upload a document to an event, the document will then always appear and can be viewed from under the Attachments tab on the event table. Select the document to download it.

- Uploading a document as an attachment to an event may be requested as part of the form content itself.
- If you are requested to upload a document in this way, simply select “+Choose file”, select the relevant document, and “Save”.
- You can also attach additional documents to the event from the Attachments tab in the event table by simply selecting the Add file option.

Removing an attachment
- If a document was uploaded as part of a form or workflow step question, you will need to go back to the respective step and remove it from the question itself. If the request to upload a document as an attachment was a mandatory request, you will need to upload a replacement document in its place.
- If the document was uploaded directly into the Attachments tab, you can delete it from within the Attachments tab by selecting X icon to the right-hand side of the attachment.

Closing and Reopening an Event
- Once all the required steps within an event have been completed, the event can be closed. Closing an event will remove it from the default Recorded Events list, though closed events can still be viewed by selecting the relevant filter. Some events may close automatically as part of the event set up; however, others may need to be closed manually.
- To close an event, from within the event itself, select Close at the top of the screen.

- If all steps within the Workflow and all Event Tasks are complete, the event will be successfully closed.
- If there are outstanding Event Tasks these can be viewed, actioned, and closed form within the Event tasks tab.
Reopening the event
- An event can be reopened at any time by simply selecting Reopen.

Abandoning an Event
-
Once an event has been started, it can be abandoned by any user with the correct permissions.
-
If abandoned, the event details will not be saved and any evidence logged, any related tasks and all assigned investigation steps will be lost.
-
To abandon an event, from within the event itself, select the Abandon Event option from the top of the screen.

-
You will be asked to enter the Event Reference along with a reason for the event being abandoned. This prevents an event being accidentally abandoned. The Event Reference is the code listed in the event title.
-
Click Abandon to confirm and the event will be abandoned.
FAQs
I do not have the options shown in this guide.
- If you do not have some of the features listed in this guide it is highly likely you do not have permission to conduct that task. Please speak to your system administrator to request the permission you require.

