Reading time 3 mins
Introduction
Scheduled tasks allow actions to be created that are automatically scheduled as per a set recurring interval. Actions can be created, assigned, prioritised, given a due date and updated until closure.
Creating a New Scheduled Task
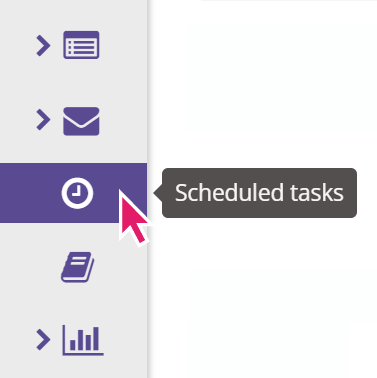
- Click on the Scheduled Tasks menu item on the left-hand menu.
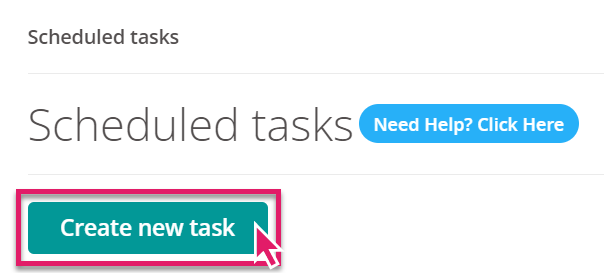
- To create a new task, click New scheduled task from the top of the screen.
- There are a number of fields to populate across 3 areas.
Details
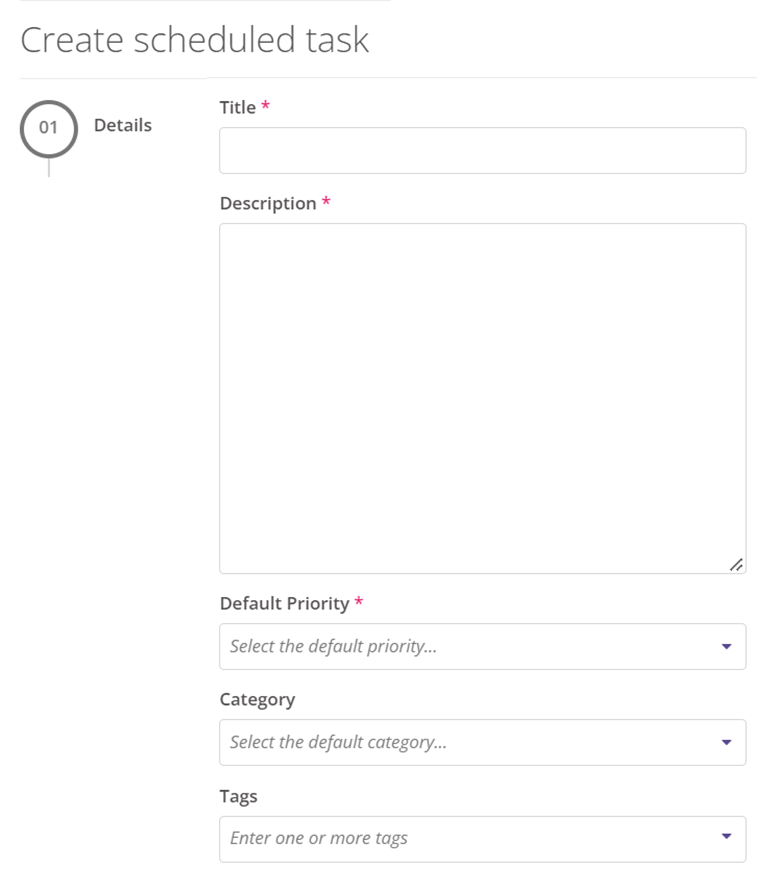
- Title. This is the overall title for the task and is what appears in the table when viewing all scheduled tasks.
- Description. This is the information your users see when they are assigned the task to complete.
- Default Priority. This will appear to the user alongside the task. Helping users make a judgement on their high, medium or low-priority tasks.
- Category. Tasks can be grouped together into categories. Any existing categories will appear on the drop-down selector. If you need a new category please type it into the box and select it when it appears below your text. Any newly created categories will be permanently available for other tasks.
- Tags. Group together tasks using tags. You can filter and report on tasks with the same tags.
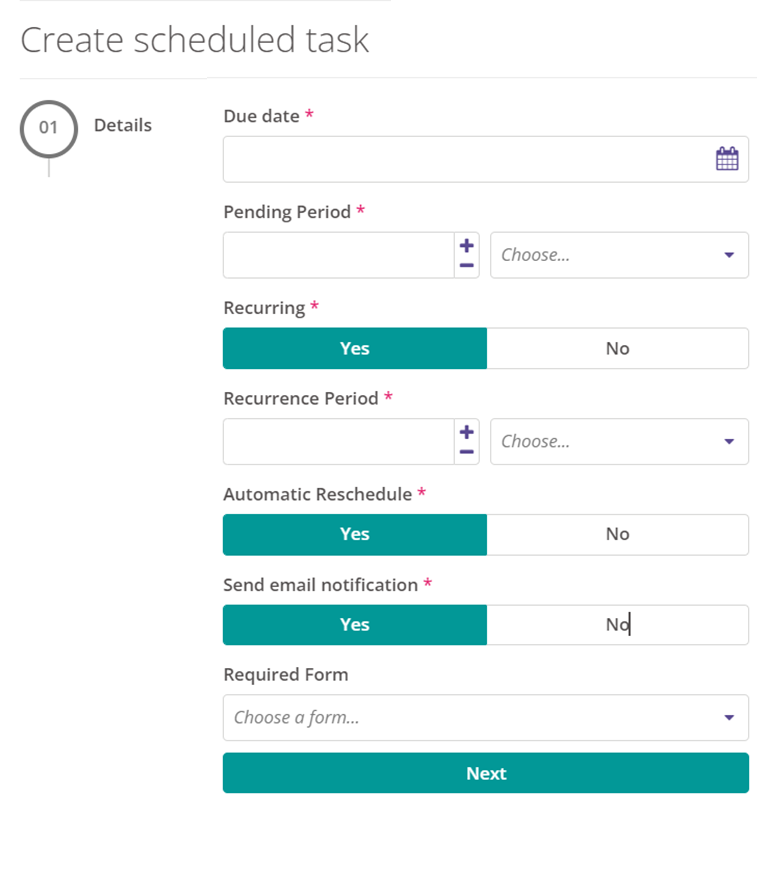
- Due date. The first due date of the task.
- Pending period. The period before the due date that the task will be set to pending and appear on the user responsible's dashboard.
- Recurrence period. Should this task repeat itself? If so, select the period of time for it to re-occur. Daily, Weekly, Monthly, etc.?
- Automatic reschedule. If yes, this task will automatically schedule itself again based on the recurrence. If no, then the user will be given the choice of which date they would like to reschedule for.
- Send email notification. Once created this will send the user assigned to the task an email alerting them of their responsibility.
- Required form. Would you like to assign a form to be completed as part of the scheduled task? The form must be created first in the Form Editor and published as a Scheduled Tasks form. Please see our separate guidance on the Form Editor for more information.
Locations
- Select the Location(s) that will need to complete the task. If all Locations within the Organisation or a Region need to complete the task, select the Region or Organisation from the list and all Locations within will be selected.
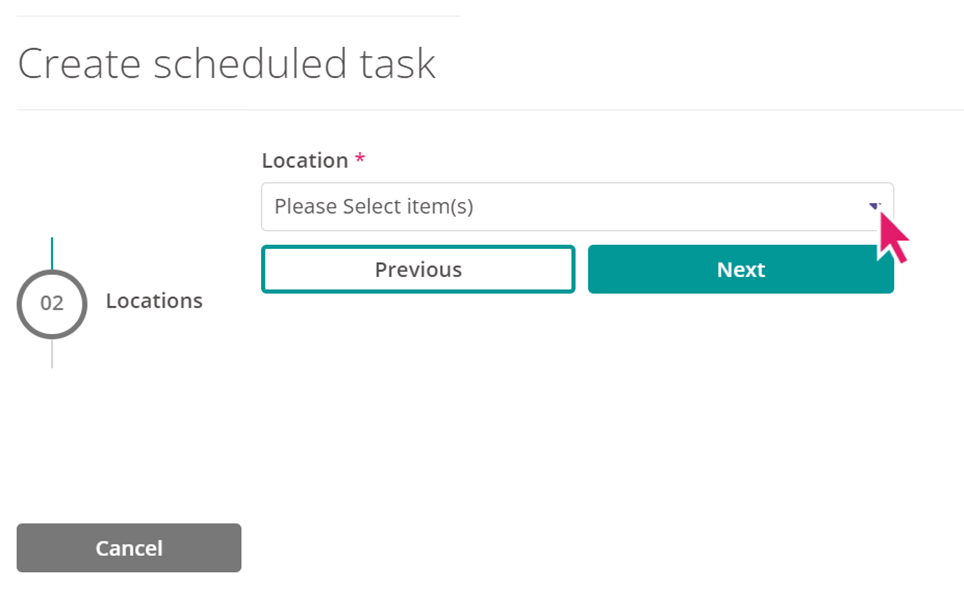
- Select which user at each location will be responsible for completing the task.
- If you have selected multiple locations you have the option to quickly assign the same user to every location. To do this select Same at the top of the location list and select the user who will responsible for completing the task at every location:
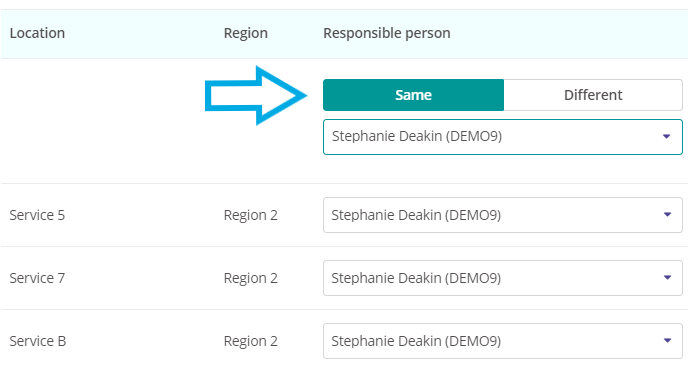
- Once you have completed the form, click Complete.
- Once created you will see the Scheduled Task against each chosen location.
FAQs
What's the best way for me to add a new location to an existing Scheduled Task?
You will need to create a new Scheduled Task for the new location. We recommend copying and pasting the wording you have used for the previous locations. This ensures when you filter or search for these Scheduled Tasks both the previous locations and the new locations show. It also avoids having two different tasks showing in the reporting (if they have different titles the system will not know they are the same task).
Will a custom list item on a form assigned to a scheduled task restrict the options by their associated location?
Yes. When completing a form which contains a element using a custom list item then the items from the list will be filtered by the location of the scheduled task so only relevant items will be shown.

